Showing posts with label Stamped Image. Show all posts

Wednesday, 3 August 2016

More Art Journal pages

Good Morning

Today I would like to share with you another couple of pages from my Journal.


This page was gently inked with Squeezed Lemonade Distress Ink.
The quote was from my Pintrest boards.
I have used Moss Green DI for the leaves and branches,
I have also used a harlequin stencil with more yellow DI.
The stamps are from the Crafters Companion Textures stamp set.


This page was inked with Moss Green DI.
Then the quote printed off and adhered to the page with Mod Podge.
The stamps are again from Crafters Companion, Textures.
The mask was a 'Cracked Ice' one which I inked through with Blue.

Thanks for stopping by. 
I appreciate all comments you may have on my creations.

Gill

Saturday, 30 July 2016

Pretty Posy Cards

Good morning

 Today I would like to share with you three cards I made using the First Edition Pretty Posy Papeer pad. I have made these using only the papers and no toppers!

All three cards have been made using 6x6" card bases.


For this first card I used the Pink lattice paper, as the background.
Then a section of the blue floral paper.
Then a small offcut of the white heart papers.
A small length of the stripy paper.
All these papers were layered onto pick cardstock.
Some pink organza ribbon was wrapped around the striped panel.
The stamp used was from the Floral Muse collection.
Three small gems in the top left and bottom right finish the card off.


For this second card I used a large square of the striped card.
Backed this onto pink card.
When I cut the blue floral papers I accidentally cut it too small.
So I divided into four squares onto the pink card.
I then wrapped the pink organza ribbon around this panel and tied a bow.
Small gems in each corner to finish.


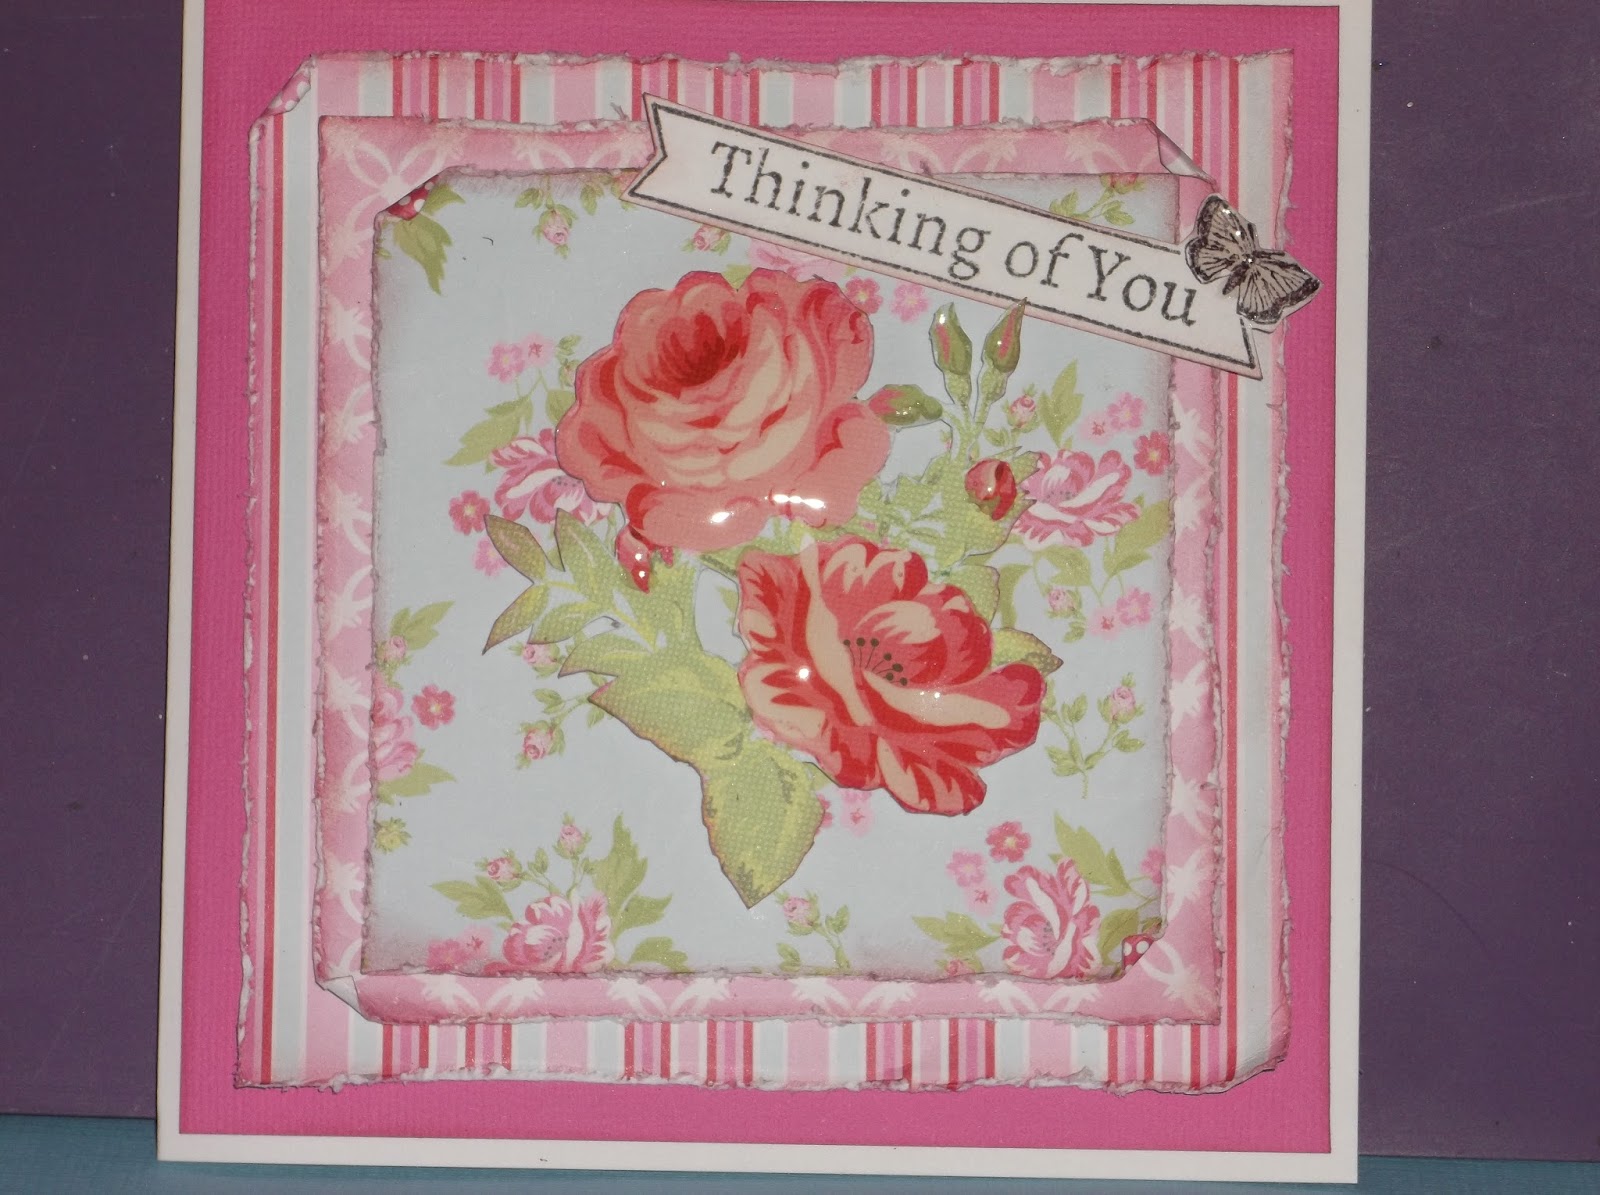
For this last card I decided not to stay clean and simple.
So I cut a piece of pink cardstock slightly smaller than the card base.
I then cut a square of the stripy paper.
A square of the pink lattice paper.
Then a square of the blue floral paper.
On each of these I inked the edges using Frayed Burlap Distress Ink.
All these edges were then distressed using a distress tool 
(you can also used your scissors to get the same effect).
I fussy cut the large roses from the papers, and then highlighted them with Glossy Accents.
This was then raised up from the card with foam pads.
The sentiment was stamped in Frayed Burlap with the butterfly coloured in Victorian Velvet.
(This stamp is from the Floral Muse collection.)

Thanks for stopping by. 
I appreciate all comments you may have on my creations.

Gill

Tuesday, 26 July 2016

Floral Muse cards

Good Morning

Today I would like to share with you a couple of cards made using Trimcraft's Floral Muse papers.
I challenged myself to use the kit, without using anything else from my stash. No Toppers, HELP!


All the cards were made using 6x6" card bases.
This first card was made using the floral paper.
Onto this I used the 'distressed' stamp, with Vintage Photo Ink.
The Butterflys were stamped onto white card with Vintage photo,
I then coloured them with Victorian Velvet ink.
The Birthday Wishes was stamped onto white card with Vintage Photo.
The wooden frame came with the kit. as did the flowers.


For this second card used the green spot paper, backed onto brown card.
A strip of the peach coloured script paper, again backed onto brown. 
Then I chose the section of paper with the butterfly on, 
Also backed onto brown card.
These were layered up and then the accordian fold heart added.
Three small gems added to the bottom left and then one in each corner of the butterfly panel.


For this card all the layers were backed onto brown card.
I used the peach script paper for the background.
Green spot paper for the vertical border.
Another section of the butterfly paper.
I used the lattice embossing folder which came with the kit to emboss some white card.
I then inked this with Vintage photo distress ink.
The sentiment stamp also came with the kit.
Some small gems in the corners complete this card.

Thanks for stopping by. 
I appreciate all comments you may have on my creations.

Gill

Wednesday, 5 August 2015

Another Stepper Card

 Good Morning

Well if your anything like me, when you get a new 'Toy', be it a die, papers or pens, you just have to play with it, lots.

So today I have another stepper card for you.


This was cut from White A4 card.
The mats were cut from pale blue Bazzill.
The stamped image was coloured with my Promarkers.
The sentiment is from Lili of theValley.
The blue nailheads are from The Stamp Pad

Quite a cute easy card.

Thanks for stopping by. 
I appreciate all comments you may have on my creations.

Gill

Thursday, 29 May 2014

A card from me

Good Morning Bloggers

Again, I have been away for a while, sorry about that. Life has been hectic and then there was work! Anyway, things are on the up again. I start a new job next week, and I think this is going to be that strt of something wonderful.
I finished my old job on Tuesday so spent yesterday trying to find my mojo! I started off by using some Hobby House toppers and just making cards with them, then one thing led to another and before I knew it I had made some cards and a small 'Prom Book' ready for my friends Daughters prom!

So today I am going to showcase the last card I made yesterday.


I have used a 7x5" card blank.
The papers are some which I have had laying around for a while.
This is a Lili of the Valley Stamped image which has been coloured in with promarkers. 
It was then die cut and then embossed and inked.
The flowers were die cut using a Marianne Die and then layered up.

I would like to enter this card into this weeks Cutie Pie Challenge,
and also this months challenge at Crafty Little Faries.


Thanks for stopping by. 
I appreciate all comments you may have on my creations.

Gill

Thursday, 3 October 2013

Classy Christmas

Good Morning

Well as promised, today I am going to show you the last card we made on the Christmas Card workshop last week at The Stamp Pad.

This one was probably the one I thought I was going to struggle the most with, if I am being honest. But it is the one I have fallen in love with the most.


For this card we stated off with a 7x5" card blank which we used landscape.
The postcard image was stamped onto white card.
We then colourd in the houses, trees, holly and berries with watercolour pencils.
We then added some blue where the snow was lying.
The image was then gently inked around the edges with distress inks.
This was matted onto some red patterned paper, which had had the edges distressed.
This was then matted at an angle onto some green patterned paper, again with the edges distressed.
On the corner, top right and bottom left was added some frantage and then gently heated from underneath, this is so the frantage powders didn't all fly away before they melted.
When sticking the green paper down, I didn't stick two of the corners and these have curled up. Which I quite like the effect of.
The card blank was also inked with the distress ink so it all tied together.


Thanks for stopping by. 
I appreciate all comments you may have on my creations.

Gill

Saturday, 14 September 2013

More Stamping

Good Morning

Today I would like to share with you another couple of cards which were made simply by stamping onto the card blank. When I say simply, not quite as you have to get the images the right way up :)


This first card was most definately NOT a simple card! 
First of all we die cut a circle from a scrap piece of card.
Then taped it to the card front, then inked through the circle.
Without moving the apeture, we then stamped through this with a script stamp. 
(Trying to make sure it is the right way up :)
Then a floral stamped image was stamped on the left hand side and a sentiment on the righthand side.


For this card we used an A6 tent fold card (folded at the top).
Using a pricking ruler and a pokey tool, we pricked a border around the card.
Then the floral stamp was stamped on both sides.
Then the solid stamp in the middle. 
A sentiment from Kaisercraft in the same ink, and there you have a simple card.


This is another A6 card, this time in Grey Pearl cardstock.
This time I used a Hot Off The Press border stamp in Silver ink.
A floral stamp in Teal ink.
A Kaisercraft sentiment in silver.
I thought this was too plain at first but it is growing on me :)

Thanks for stopping by. 
I appreciate all comments you may have on my creations.

Gill
Friday, 13 September 2013

White Christmas

Good Morning

Today I would like to share with you a couple of White Christmas cards. Now this was quite difficult for me as with Christmas I usually throw lots of  colour at it.


This is an A6 landscape card blank.
The white card was embossed with a cuttlebug Snowflake embossing folder to cover 3/4 of the card.
Then using my score board we wmbossed three straight lines (only two show up in the photo).
Then we wrapped some spotty organza ribbon around the card and knotted it.
The embossed card was matted onto Silver card.
This was them matted onto the card front.
A silver peel off greeting and there you have a simple yet stylish card.


This card was made using a 6x6" card blank in a mushroom colour.
The white pearl card was embossed using a bauble embossing folder.
This was then gently inked with Pumice Stone distress ink.
The Snowman was stamped in Pumice Stone onto the same pearl card stock.
The image was then die cut using nesties Labels 4 die.
This was also gently inked with Pumice Stone.
A fabby silky crush ribbon bow, and there you have it!
Sounds easy, and it was until I got to the bow! 

Thanks for stopping by. 
I appreciate all comments you may have on my creations.

Gill

Thursday, 12 September 2013

Cute Christmas

Good Morning

Today I would like to share with you anothe cate I have made for Christmas! I have used a gorgeous Hobby House die cut topper on this card.


For this card I have used a 6x6" Kraft brown card blank.
The die cut image was not the right shape for my card, so I die cut it with Nesties Lables 26.
Whilst the image was still in the die, I gently inked it.
I then die cut the pearlised blue card in the next size lables 26 die.
The background paper was one that I have had in my stash for a long time! The reason it was still sat there was becaused I didn't really like it. So I got out my distress ink in Stormy Sky and a swirly dotty stamp.
This on top of the paper really brough it to life.
The papers were layered up flat as shown.
Some larger red pearls in the corners of the card.
Some small red pearls in the corner of the image.
And I have a card I really liked from a piece of patterned paper I really didn't like!

I would like to enter this card into this weeks Cutie Pie Challenge


Thanks for stopping by. 
I appreciate all comments you may have on my creations.

Gill

Wednesday, 11 September 2013

Flat Cards

Good Morning

Today I would like to share with you a couple of cards I made during a workshop at The Stamp Pad in Saddleworth recently. We were looking at one layer or flat cards, you know the ones which don't cost a fortune to post these days! It was a really good back to basics workshop. It alkso reminded me of how many stamps I have and the fact I really need to get them out and play more!


This first card is a simple 5x5" card blank.
Along the bottom we stamped three solid circles in a pale yellow colour.
Then using small flower stamps, simply stamped these in black, one in each circle.
A stamped message and away you go.


This second card is an A6 white card blank.
This time we used a shabby recetangle solid stamp.
This was stamped three times in two colours, slightly overlapping.
A floral swirly border was stamped in a complementary colour.
A message and a few gems and another finished card!


Thanks for stopping by. 
I appreciate all comments you may have on my creations.

Gill

Thursday, 27 June 2013

A Photo Display

Good Morning

Today I would like to share with you an 'Off the Page' project. The was a photo display I made up and decorated for my Sister in Law for her Christmas Present last year! She did get it on time and has now put photos on it :)


The whole project was a Kaisercraft Kit which I bought from The Stamp Pad in Saddleworth.
The whole thing was then painted with a Terracotta acrylic paint.
I then stamped flourishes in Gathered Twigs Distress Ink all over.
The paper was one from my stash, this was double sided so I picked the best bits from both sides.
I hope you like this.

Thanks for stopping by. 
I appreciate all comments you may have on my creations.

Gill

Friday, 21 June 2013

Another Man Card

Good Morning

Today I would like to share with you another card for a man! This one was made in a workshop held at The Stamp Pad in Saddleworth. This one is more dark and grungy than I would normally make, but that is why I love going to workshops to take me out of my comfort zone!


This is a 6x6" card blank made from black card.
The paper is a bluey grey plain peice which was embossed using a 'bubbles' embossing folder.
The stamped sentiment is from Tim Holtz.
The 'Umberella Man' die was used with black card for the man..
A Tim Holtz 'houses' on the edge dies was used.
The main part of the umberella was done using honeycomb paper. 
So this makes the umberella 3D. 

Thanks for stopping by. 
I appreciate all comments you may have on my creations.

Gill

Thursday, 20 June 2013

Lili's Little Faires

 Good Morning

Today I would like to share with you a card made for the latest challenge over at Lili's Little Fairies. I love this challenge as it gives me chance to play with my (Few!) Lili of the Valley stamps.


This card is a 7x5" card blank used landscape.
The stamp is Bumble Bee Fairy.
The was stamped and coloured with Promarkers.
Then Die cut using nesties Labels 30.
Whilst still in the die, I inked with Rusty Hinge Distress.
The paper for this card is from a First Edition Paper Pad.

Thanks for stopping by. 
I appreciate all comments you may have on my creations.

Gill

Tuesday, 4 June 2013

Wedding Candle

Good Morning

Today I would like to share with you a stamped wedding candle I made at a workshop over at Lili of the Valley on Saturday. I LOVED this technique.


This is the finished candle, it is gorgeous!

First of all we stamped the chosen image onto tissue paper, and then coloured it in with promarkers.
Then we cut aroung the image, but you don't have to be too precise :)
Then you put the image in place ( it holds on with a bit of lick from your finger) and gently wrap greaseproof paper around it. Ensureing that you keep it smooth and with no crease's in it. Then gently heat with your heat gun, you can tell when it has stuck as the colours go slightly darker, a bit like when you are heating embossing powder.

Then all you need to do is to decorate your candle :) We used some silver hearts ribbon around the bottom and then die cut some hearts, which were edged in grey pen and then glamour dust.We then added some sparkly gems and some pearl dots with pearl stickles.
We gathered up some tulle with a simple running stitch and pulled it tight to for a small circle, put the flower in the centre and stuck to the other side of the candle.


We then cut 2 round bases from greyboard and white card and stuck these together to give a nice base to the candle.


We then made a box to put the candle in, although we didn't have time to decorate it. I may do later :) 


This is picture of the candle in the box :)


TOP TIP :- If you buy unmounted stamps and then mount them yourself onto UMount or KlingOn. Place your stamps onto the sticky side and then, before you cut them out, sprinkle talc onto the sticky areas showing between the stamps. This then enables you to cut around your stamps without your scissors getting all stuck up! If you get talc on your stamps don't worry as this wipes off with a clean baby wipe :)

Thanks for stopping by. 
I appreciate all comments you may have on my creations.

Gill

Monday, 22 April 2013

John Glossop

Good Morning

Over the weekend I was lucky enough to go on a workshop run by the talented John Glossop at the Stamp Pad. On this workshop we made a book type box. Or a Box type book depending on how you prefer it.

This first photo shows the front of the box/book. 
The whole project was made from 2mm Greyboard which had been scored through so that it would crease to form the corners.

We also cut some greyboard to form the frame and two end panels.

The greyboard was put through an embossing folder and tehn painted first with white paint and then with some runny blue paint to highlight the embossing.
 The rest of the greyboard was also painted with white paint and then had a wash of blue paint over the top.
The piece of greyboard in the middle was painted white, the lady stamped on it. 
Then we, very carefully painted the outside with gold paint. 
When this was dry we triple embossed it with clear powder to gice the shine.


Inside the 'book' we used different stamps and colours of distredd inks to create a  'collage' effect.
This is a great technique as it doesn't matter if your stamping isn't perfect.


The two insides of the 'side' pieces were covered with torn pieces of printed tissue and attached with melted beeswax, the beeswax also gives a different finish.

On the back inside page we used the Bind-It-All to make a notebook.


This is a better picture of the 'collage' stamping.

Thanks for stopping by. 
I appreciate all comments you may have on my creations.

Gill

Saturday, 20 April 2013

Cards using Glass Gels

Good morning

Earlier this week I went to a workshop run by the uber talented Gwen at The Stamp Pad, in Saddleworth. This workshop was not one I would have rushed out t book on as I thought that glass gels were only for use on Glass! Oh my word, how wrong was I?

We spent the evening exploring the different things you can do with these wonderful gels. First of all we practised making a row of pearl like dots. These gels are great for this, and it means that you can always colour coordinate your work.


Then we stamped a Daffodil image (from Stampendous) and using the gels coloured the image in. It took a bit of practice But you can get some very different effects. If you only use a small amount, you get a light covering. However if you use a fair amount it becomes quite vibrant and dimensional.

We then played with the gels through a stencil. You have to be quite quick with this as you need to wash the stencil very soon to stop the gel sticking to the stencil. We found that you have to be very methodical with this or you can soon get into a mess :)


We then stamped a sentiment onto white card, scribbled different colours of glass gel onto acetate and, using rubber gloves, tapped into the gel to move the colours around. Because the gel is very tacky before it drys, we then struck the acetate over the stamped image. This became a topper on our card. This also means that everything can be colour coordinated.

Yet again I have gone to a workshop without knowing exactly what we will be doing and come away completely inspired. If you're in the area why don't you see if there is space on a workshop and come along.


 Thanks for stopping by. 
I appreciate all comments you may have on my creations.

Gill


Thursday, 4 April 2013

Girly Steampunk!

Good Morning

Today I would like to share with you my last Kanban Steampunk card which I made on a fabby workshop with Julie at The Stamp Pad last week.

This card was my favourite of the evening, probably because it is pink and girly :) Much more me.


This card is made from a 7x5" card base, we used pearlised lilac card.
The backing card was a pale pink Kanban card with silver flowers and clocks on it.
This time the stamped image was watercoloured with a purple distress ink. 
Then the image was carefully cut out and mounted onto foam squares.
The backing card for this was the same pearlised card which had been stamped and embossed using the clock stamp.
This was then matted onto a raspberry coloured card.
The sentiment is from a set from Craftwork Cards, this was inked to tie in.

Thanks for stopping by. 
I appreciate all comments you may have on my creations.

Gill

Wednesday, 3 April 2013

Male Steampunk!

Good morning

Today I would like to share with you another Kanban Steampunk card which I made at The Stamp Pad with the talented Julie. As I said yesterday this took me out of my comfort zone.


This card is made from an A5 card blank.
The image was stamped onto white card and then he was coloured in with distress inks using a waterbrush.
This is great as you don't have to be good at painting :)
The stamped image was then matted onto gold mirri card.
A metal corner attached in the top right hand corner.
The next mat was white card which had been gently inked with distress inks,
 then stamped with the clock, hat and cogs stamps in different colours.
Again this was matted onto gold mirri card.
The whole thing was then matted onto a green and gold patterend paper.
A Kanban Sentiment rosette was added to finish the card off.

Thanks for stopping by. 
I appreciate all comments you may have on my creations.

Gill

Tuesday, 2 April 2013

Happy Easter !

Good Morning 

Sorry there has been no post from me for nearly a week, I have been travelling all over (including London) as I have 4 job interviews last week. Then I spend the Easter weekend with Family and Friends.

Back to todays card. This card is probably not one I would have done myself as I don't do Steampunk, and rarely do Kanban. This is combination of both! Last thursday I went to a workshop at The Stamp Pad. As I said I don't normally do Steampunk but I decided to get out of my comfort zone, doing this at a workshop I get to try the effect without having to spend loads on the equipment. 


This is a cream DL card blank.
The backing paper is from Kanban Steampunk range.
The image was stamped onto the cream panel. 
The image was then stamped onto the pink background paper.
The hat and dress were then cut out of the paper and put over the stamped image.
A strip of the patterned paper at the bottom with a sentiment from the same range.
Where the flower on the hat was we used gold frantage on the card.

As I said way out of my comfort zone, but I really enjoyed the workshop. I have another two cards to show you from this session.

Thanks for stopping by. 
I appreciate all comments you may have on my creations.

Gill


Saturday, 23 March 2013

Cat and Dog !

Good Morning

Today I would like to share with you another card made using the gorgeous Lili of the Valley stamp 'Let's Party'. This stamp was a free gift that people got during the 9th Birthday Party  held recently.


The card is made from Bazzill card cut to a 6x6" card blank.
The papers are from the 'Candles and Cake' paper pad.
The image was stamped and coloured with Promarkers.
This was then die cut using Nesties Labels 2.
Three buttons top right and bottom left just finish the card off.

Thanks for stopping by. 
I appreciate all comments you may have on my creations.

Gill