Showing posts with label Stamp Pad. Show all posts

Wednesday, 5 August 2015

Another Stepper Card

 Good Morning

Well if your anything like me, when you get a new 'Toy', be it a die, papers or pens, you just have to play with it, lots.

So today I have another stepper card for you.


This was cut from White A4 card.
The mats were cut from pale blue Bazzill.
The stamped image was coloured with my Promarkers.
The sentiment is from Lili of theValley.
The blue nailheads are from The Stamp Pad

Quite a cute easy card.

Thanks for stopping by. 
I appreciate all comments you may have on my creations.

Gill

Saturday, 1 August 2015

Hobby House again !

Good morning

Again today I have a couple of card featuring the Hobby House toppers. They are soo cute and not just for younger childern.


This first card is more for the younger 'men' in your life.
The Topper is by Elisabeth Bell, for Hobby House.
The Papers are from Krafty Christmas by Do Crafts.
All were matted onto Kraft Brown card, using my Perfect Layers Tools.
Small gems from Artwork, by Artoz.


This next card is for the slightly older 'men'.
Again it is a 6x6" card blank.
The topper is by KennyK for Hobby House.
The backing paper is again from the Krafty Christmas paper pad.
This time the topper was layered up with blue and red Bazzill.
A red nail head places in each corner.

All from Gwen at The Stamp Pad.


Thanks for stopping by. 
I appreciate all comments you may have on my creations.

Gill

Friday, 31 July 2015

Pins & Needles

Good morning

Today I would like to share with you two cards I have made recently using some fabby Hobby House toppers and backing cards.


Both cards are made with a 6x6" card blank.
The topper pack is called Needles and Pins, from Hobby House
On both of these cards I have matthed the topper and card onto Green Bazzill cardstock.
I used my Perfect Layers tool to get the mats right.
Then I used Candy Dots in each corner.
I felt that the toopers looked a bit Stark, so I stamped around the edges.


The toppers and backing card were bought from The Stamp Pad in Greenfield.

I am trying to make cards two at a time at the moment, as I have the cordinating papers and things on my desk. Well, thats the theory :)

Thanks for stopping by. 
I appreciate all comments you may have on my creations.

Gill

Saturday, 25 July 2015

Long time, no post


Well hello there.


I have been very remiss in not posting lately. Life just seems to have gotten in the way. As well as not having much time to craft, when I have had the time, I haven't had much inclination.
I have also had problems with my PC. It was still running on Windows XP and so slow, it could take up to an hour to write a blog post and add a photo! I now have a nice new computer which is super fast, it is taking some getting used to!

Hopefully my crafting mojo has returned, not to disappear.

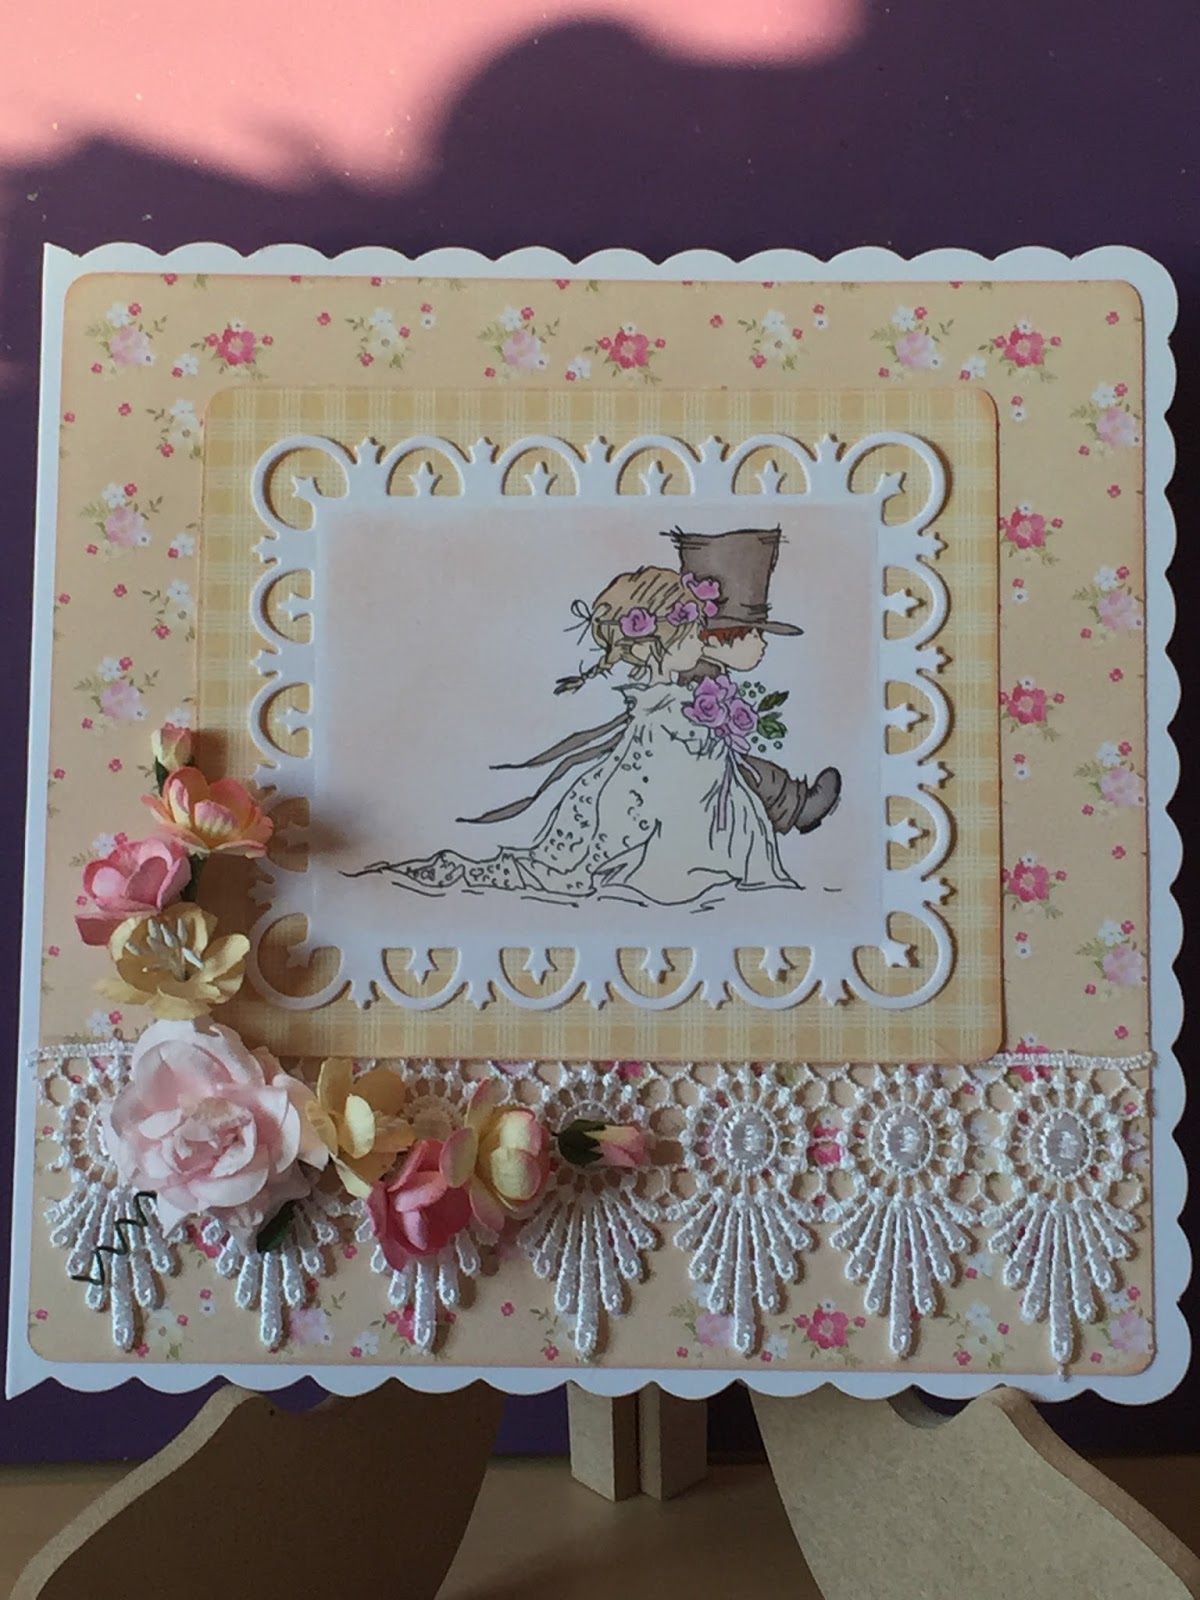
Today I would like to share with you two wedding cards.


They are both 8x8" scalloped card blanks
The papers are from Lili of the Valley.
The Stamp is Wedding Couple by Lili of the Valley.
Coloured in with my Promarkers.
Die cut with Spellbinders Fleur De Lis rectangles.
The flowers are from Wild Orchid Crafts.
The lace is from Gwen at The Stamp Pad.


As you can see, all I have changed is the colour schemes and the cards look very different. My aim when crafting at the moment is, if I have to make a card (like a wedding card) I am going to try to make two. Because I haven't crafted for a while, I am running low on cards! ! 

I am also going to try to make a Christmas Card on the 25th of each month, and then replicate it 10 times! Well that is the plan :)

Thanks for stopping by. 
I appreciate all comments you may have on my creations.

Gill

Friday, 31 October 2014

None Christmas

Hi There

Today I would like to share two non-Christmassy cards with you.


Both these cards are made on 7x5" card blanks.
The toppers are from LOTV, although I have stamped around the edges.
The paper is left over from a mini book I recently made at the Stamp Pad.

Gwen has stared to run a monthly 'Book Club'.

Thanks for stopping by. 
I appreciate all comments you may have on my creations.

Gill

Tuesday, 26 August 2014

Cutie Pie Challenge

Hi there

Today I would like to share with you a card I have made for this weeks Cutie Pie Challenge. This weeks theme is Buttons and Bows. As with my recent makes, this is again using a Hobby House Topper. I am really enjoying the process of making up cards with these at the moment as I haven't got the time to be stamping and colouring in.


This is a 6x6" card blank.
Everything is matted onto Kraft brown cardstock.
The background papers is actually Hobby House card in Snowflake Flurry and Check.
Around the topper I have stamped a snowflake stamp in Festive Berries Distress Ink.
I think this just takes away the starkness of the white topper.
I have added a red organza bow.
There are three small red buttons in the bottom right hand corner,
 and one large red button in the top left hand corner.

I would like to enter this into this weeks Cutie Pie Challenge.


Thanks for stopping by. 
I appreciate all comments you may have on my creations.

Gill

Sunday, 24 August 2014

Another Hobby House

Hi There

Yes I'm afraid its another Hobby House card from me today. For this card I have tried to go a bit more shabby vintage with this, but I'm not sure it has worked.


This is a 7x5" portrait white card blank.
The papers are from a Craft Emotions paper pad.
Everything has been matted onto Kraft cardstock.
There is some cream lace wrapped around the bottom layer. 
I have added a cream doily in the top right hand corner.
A gem in each corner of the topper.
A small bow in the top right hand corner.


Thanks for stopping by. 
I appreciate all comments you may have on my creations.

Gill

Saturday, 23 August 2014

Another from me!

Hi There

I have been trying to use some of the many toppers I have which appear to be breeding in my craft room! I don't remember buying this many :)


This card is a 7x5" card blank which I have done landscape.
The papers are from a gorgeous Craft Emotions paper pad.
The topper is one by Elisabeth Bell from The Hobby House.
Everything has been matted onto Kraft cardstock, using my Perfect Layers tools.
Some amber gems in each corner of the topper, 
and three top left and bottom right finish the card off nicely.

All the goodies to make this card were bought from The Stamp Pad.

Thanks for stopping by. 
I appreciate all comments you may have on my creations.

Gill

Tuesday, 8 October 2013

Christmas Post

Good Morning

Tpday I would like to share with you a couple of cards made during last week workshop at The Stamp Pad. We were using the wonderful 'Chrsitmas Post' kit from CraftworkCards. Now I don't need any more Christmas papers, but want? Well that is another story :) These are gorgeous papers.


This first card was quite simple to make yet very effective.
A 6x6" card blank matted with a sheet of paper from the kit.
The baubles were die cut from the patterned paper and then stuck back to back to create a 3d effect.
 The tag was from the die cut sheet in the pack.
Then some Card Candi top left and bottom right .
Some ribbon and there you have it :)


Again the card was made using  6x6" card base.
This time we trimmed about 2cm off the right hand side.
Behind this we stuck a strip of patterned paper inside the card.
The it was simply two strips of the patterned paper. 
Cut into a 'V' at the botttom.
Then the die cuts were added and layered up.
I then used glamour dust to brighten up some of the pieces.


This last card was also a 6x6" card base.
We took a 5 3/4" square of the birdy patterned paper, and toen the top right hand corner off.
Beheind this we placed a square of paper with the stamp and postmark on.
The flower was made using the die cuts in the pack.
Then we added some more of the Die cuts from the pack.
Added glamour dust to give it sparkle and there you go.

Thanks for stopping by. 
I appreciate all comments you may have on my creations.

Gill

Thursday, 3 October 2013

Classy Christmas

Good Morning

Well as promised, today I am going to show you the last card we made on the Christmas Card workshop last week at The Stamp Pad.

This one was probably the one I thought I was going to struggle the most with, if I am being honest. But it is the one I have fallen in love with the most.


For this card we stated off with a 7x5" card blank which we used landscape.
The postcard image was stamped onto white card.
We then colourd in the houses, trees, holly and berries with watercolour pencils.
We then added some blue where the snow was lying.
The image was then gently inked around the edges with distress inks.
This was matted onto some red patterned paper, which had had the edges distressed.
This was then matted at an angle onto some green patterned paper, again with the edges distressed.
On the corner, top right and bottom left was added some frantage and then gently heated from underneath, this is so the frantage powders didn't all fly away before they melted.
When sticking the green paper down, I didn't stick two of the corners and these have curled up. Which I quite like the effect of.
The card blank was also inked with the distress ink so it all tied together.


Thanks for stopping by. 
I appreciate all comments you may have on my creations.

Gill

Tuesday, 1 October 2013

Awol Mojo

Good Morning

Sorry I have been sporadic in posting recently, I seem to have misplaced my crafy mojo :(

So to try any revive the said mojo, I have been to a Christmas Card workshop with the talented Gwen at The Stamp Pad in Saddleworth. Well I'm not sure what she did, but my mojo has come back :) Thank You.


For this first card, we used a 6x6" square card blank. The papers came from one sheet of double sided paper, great trick if you want your papers to match!
The stamp is from an InkadinkadooChristmas set.
This was stamped and then embossed with some frantage embossing powder.
This was on some card which had been die cut using Nesties Labels 4 (Still a great favourite)
The holly flourish in the top right hand corner is a Cherry Lynn Die, as we didn;t have the right colour card, we used white pearl card and then coloured it with Distress inks.
A few red gems for the Holly Berries, and you have a simple yet stunning card.


For the second card we used a new Stampendous Snowman and friends stamp.
He and his friends are divine! Loving colouring in at the moment.
The 'Merry Christmas' sentiment is from an Inkadinkadoo set.
Snowman was stamped and then coloured in,
To get teh arched top to the image, we placed a circle nestie on the image, but only cut half way.
Some blue glitter starry card on the top half of the card.
Then at the bottom we tore four strips of card to create the snow drifts.
The back two were stuck flat to the card, then we stuck snowman on.
Then the front two were stuck on with foam pads. We then glittered the top edges.

Call back later in the week for a look at the last card from this class. 

Thanks for stopping by. 
I appreciate all comments you may have on my creations.

Gill

Saturday, 14 September 2013

More Stamping

Good Morning

Today I would like to share with you another couple of cards which were made simply by stamping onto the card blank. When I say simply, not quite as you have to get the images the right way up :)


This first card was most definately NOT a simple card! 
First of all we die cut a circle from a scrap piece of card.
Then taped it to the card front, then inked through the circle.
Without moving the apeture, we then stamped through this with a script stamp. 
(Trying to make sure it is the right way up :)
Then a floral stamped image was stamped on the left hand side and a sentiment on the righthand side.


For this card we used an A6 tent fold card (folded at the top).
Using a pricking ruler and a pokey tool, we pricked a border around the card.
Then the floral stamp was stamped on both sides.
Then the solid stamp in the middle. 
A sentiment from Kaisercraft in the same ink, and there you have a simple card.


This is another A6 card, this time in Grey Pearl cardstock.
This time I used a Hot Off The Press border stamp in Silver ink.
A floral stamp in Teal ink.
A Kaisercraft sentiment in silver.
I thought this was too plain at first but it is growing on me :)

Thanks for stopping by. 
I appreciate all comments you may have on my creations.

Gill

Wednesday, 11 September 2013

Flat Cards

Good Morning

Today I would like to share with you a couple of cards I made during a workshop at The Stamp Pad in Saddleworth recently. We were looking at one layer or flat cards, you know the ones which don't cost a fortune to post these days! It was a really good back to basics workshop. It alkso reminded me of how many stamps I have and the fact I really need to get them out and play more!


This first card is a simple 5x5" card blank.
Along the bottom we stamped three solid circles in a pale yellow colour.
Then using small flower stamps, simply stamped these in black, one in each circle.
A stamped message and away you go.


This second card is an A6 white card blank.
This time we used a shabby recetangle solid stamp.
This was stamped three times in two colours, slightly overlapping.
A floral swirly border was stamped in a complementary colour.
A message and a few gems and another finished card!


Thanks for stopping by. 
I appreciate all comments you may have on my creations.

Gill

Friday, 6 September 2013

More Hobby House

Good morning

Today I would like to share with you another card made using the fabby Hobby House die cut sheets.

This card ws made using a Pink 6x6" card blank.
Some swirly organza ribbon arounf the spine of the card.
Some white peel offs in the corners.
The image was die cut in a circle and then matted onto a scalloped circle of the pink card.


As you can see from this next shot, as the card opens, the die cut swings in the apeture! 


Thanks for stopping by. 
I appreciate all comments you may have on my creations.

Gill

Thursday, 5 September 2013

Hobby House

Good Morning

Today I would like to share with you some cards made with my new obsession! Hobby House die cut sheets, and wonderful embellishments.

This first card is a 6x6" sqaure mint green card  blank.
The backing paper reads Happy Birthday and was mounted onto white card.
The image was a circular image which wsa matted onto white card and then die cut using the spellbinders hexagon die. As well as cutting the hexagon shape, this also made the diecut flater to the card.
Some peel off corners and a message finish this card off.


This second card is also featuring a Hobby House die cut.
Again it is using a 6x6" white card blank.
This is the same image only a different size.
This has been die cut using a scalloped circle die.
The backing paper is vellum, which has been attached using some fabby pearl brads to some mushroom coloured card, before sticking to the card.
Some spotty ribbon around the middle and another embelishment from the Hobby House.


Thanks for stopping by. 
I appreciate all comments you may have on my creations.

Gill

Wednesday, 4 September 2013

Catching Up

Good Morning

Really must catch up with myself. Having not blogged for what seems like ages I have lots of cards to show you.

This is another card made using the Craftwork Cards Time Flies Collection.
The fabby panel in the middle was made using a corner die!
I was a bit fiddly, but you get a square of paper/card and die cut opposite corners and then trim off the sections between them!
The rest was just die cut pieces matted and layered up.


Thanks for stopping by. 
I appreciate all comments you may have on my creations.

Gill

Tuesday, 3 September 2013

Long Time No See

Hello There

Sorry I have been Awol for a while. Things have been a bit hectic and I really need to get more organised.
Also my crafty mojo has been for a walkabout :)

My first card I want to show you was made on a workshop with the talented Gwen from The Stamp Pad in Greenfield.


This is a 6x6" card blank in white. 
All the papers on this card are from the Craftwork Cards 'Time Flies' Collection.
The purple circle in the middle is gorgeous purple velvet paper which has been embossed and then cut out using s scalloped circle spellbinder die.


This second card was made using a scalloped 6x6" card blank.
The papers are from Craftwork Cards Time Flies.
Not sure if this shows on the image, but the background card was a piece of white card embossed with a folder called Swiss Dots.

Thanks for stopping by. 
I appreciate all comments you may have on my creations.

Gill

Friday, 5 July 2013

Wedding / Prom Card

Good Morning 

Today I would like to share with you another card made at a recent workshop at The Stamp Pad. in Saddleworth.


This card is a 6x6" card blank.
The roses background is vellum, which I haven't used for such a long time.
This was backed onto some brown card, we tried on a few different colours of card, but found that the brown gave the best colour overall!
We added the ribbon about an inch up from the bottom.
The stamped image was a Clarity  Stamp.
this was stamped in Brown ink onto cream card.
A few brown pearls (hmm they look a bit wonky!)
The flourish in the top corner is from a Crafts Too die cut.

Thanks for stopping by. 
I appreciate all comments you may have on my creations.

Gill
Tuesday, 2 July 2013

A Wedding Card

Good Morning 

Today I would like to share with you a card I made on a workshop last week at The Stamp Pad in Saddleworth. The workshop Title was weddings.


This card was made with a 6x6" card blank. 
We then used a white Kanban card with Silver foiling on and matted this onto silver mirri card.
We then Die cut a silver heeart and then another smaller heart rfom the patterned card.
The silver heart was then embossed with the Swiss Dots folder.
Some gorgeous silky organza ribbon was then wrapped arounf the layers before they were stuck onto the card front.
A bow was added with a blingy gem.

Thanks for stopping by. 
I appreciate all comments you may have on my creations.

Gill

Saturday, 29 June 2013

Another Candle

Good Morning

Today I want to share with you another candle I have decorated, I am really enjoying these at the moment.


This is one of the side views of the candle. 
This time I used the image Love Balloon from Lili of the Valley
Coloured in with Promarkers.


The flowers are a mixture from Wild Orchid and The Stamp Pad.
I'm a sucker for pretty flowers of all shapes and sizes.


Again I then used a pearly paint pen to draw small dots on the candle as decoration.
Now I just need to make some boxes to put them in.

Thanks for stopping by. 
I appreciate all comments you may have on my creations.

Gill