Thursday 28 July 2011

A Birthday Card

Hi There

Well after a few posts of Altered stuff, I have made a card!
This card is for a very special young lady's birthday.


I used a 7x5" scalloped edge card blank. The backing paper is from a Craftwork Cards Set of gorgeous pink, cream and beige's with foiling on. I then got out my trustie Nesties, Labels 10. I used the two largest sizes in white and purple. The white nestie was edges with pink Distress Ink. The main image on the card is a decoupage Me to You, Tatty Ted, Bear. This was shaped and layered with pinflair glue to give  it a bit more dimension.  The tag at the bottom was another nestie from the Fancy Tags Two set, again this was inked with distress inks. After searching for ages to find a ribbon to match, to thread through the tag, I had almost given up. Then I had a brianwave of using a narrow strip of the purple cardstock and threading this through the tag. A Happy Birthday peel off and the card is done.

Happy Crafting

Wednesday 27 July 2011

Foam Board Project

Hi there

A few days ago I showed a project I had made on a workshop using Kraft Resist paper and foamboard. Well I have had a play and made another one, without Julie's help. It was a little scary at first, I was worried I would cut the foamboard in the wrong place or the paper. But it is only paper and I had some more!
Again the foamboard project was done landscape. This time the butterfly paper was used and inked all over with distress inks in victorian velvet, mustard seed and dried marigold. Edged with tissue tape, the tickets and lace were all inked to match.
 A stamped butterfly, from Elusive Images fills the top recess with a small dragonfly charm at the bottom right. The foamboard from here was covered and tissue taped as before. The I cut a butterfly from the rest of the 12x12 paper, this was then covered with Diamond Glaze and left to set. This gives the butterfly an epoxy type covering.
The foam board in the other recess was trimmed down so that if fitted back in the recess, leaving a small gap around three sides and a larger one at the bottom. The saying was stamped and embossed in black onto some paper, left over from another project. This was then wrapped around the foamboard and stuck into place. There is no truth in the rumor by my hubby that this was done to cover up some wonky stamping! Well there is a bit on dodge stamping underneath!
The main butterfly was glittered using stickles in Icicle, which I spread with my fingers, and the top butterfly was done using distress stickles in Rock Candy. The bird at the bottom was covered with grey Inka Gold and then covered using Accent Beads.

Tuesday 26 July 2011

End of School Year - Part 2

Hi There

Some of you may remember the daughter of a friend of mine requested an autograph book for when she left Primary School to go to Senior School.
Well this is my finished article. I had to try and not go over the top as her big sister didn't want me to make it better then hers!

This is the front of her book. It was 6x4" greyboard, covered with red Inka-Gold. The 2 large flowers were from a set by Bobunny. The square in the middle is a tag by Making Memories, with 3 rub ons by Kaisercraft. The swirls are peel offs. The book was bound together using my Bind it All and ribbons and fibres ties around the wires.

The inside Cover was stamped using Distress inks in Victorian Velvet and spun sugar. The stamps are by Inkadinkadoo,  Artistic Flourish and Gem Stone Flourish.

The inside pages were all stamped onto, leaving enough room for all the messages from her friends.


This is the finished book, she was delighted with it when I saw her at the weekend. A lasting reminder of friends she was at Primary School with. Better than them signing her shirt! 

Happy Crafting

Monday 25 July 2011

Hi There

Hi

Sorry for no posting last week, life seems to have got in the way of crafting in the last week or so!
Any way, I thought I would share with you a project I made at a recent workshop at The Stamp Pad in Saddleworth. The workshop was run by the Fabby Julie, for those of you who don't Julie, she does amazing stuff but isn't very 'pretty and girly' in her crafting.
This was made with a piece of Foamboard. The paper is from Tim Holtz Kraft Resist Pad. The background was coloured with Distress Stains in Broken China then I inked the bird with normal distress inks. The 2 recesses were cut out of the foamboard before the paper was attached, then the hole were re-cut in the paper. Before the backing paper was applied, I stamped my quote which appears in the bottom recess.

The square foamboard which was taken from the top was covered with some of the off cut from the12x12 paper. The edges of this, and the edges of the main piece were then finished off with Tim's Tissue Tape. Once stuck in place this was inked to tone in with the rest of the project.


The butterfly in the top recess was a metal embellishment, the two birds and butterfly were wooden embellishments covered with Dark grey Inka Gold, then some Accent Beads added.Some lace ribbon down the left hand side and two tickets from Tim Holtz, These were all inked to tone in and then the tickets were attached with a Tim, Memo pin.


I really wasn't sure about this when it was finished, but it has really grown on me. So much so that  I have made another one! But that is for another time :)

Monday 18 July 2011

An Easel Card

Hi there

i would like to show you an easel card which I made last year. I put it away somewhere safe for a birthday, yep I've only just found it :) Luckily the birthday was in August, so I can use it this year.
This card was covered with purple patterned paper. The image was stamped with versamark and embossed with Black Sparkle powder. Then the sentiment was stamped in Black Brilliance. Two strips of BoBunny spotty ribbon were attached top left and bottom right. with three lilac pearls in graduating sizes alongside it. The flowers are by Prima and a pearl added in the centre of each. Oops just realised my fairy is wonky! Think she may have had a little drink!

Happy Crafting

Sunday 17 July 2011

New Stamp

Hi There

I have been playing with my new stamp again! My mum pointed out to me yesterday afternoon that the flower was a poinsetta ! If it's not a rose or a daffodil I struggle to know what they are!
Anyway I decided that if that was what it is I would do some Christmas Cards with it :)


This first card is a black 6x6" card. The background is white Bazzill embossed card. Then the topper was stamped with white ink and then embossed with white powder, onto black card. This was then cut with Nesties Labels 16, matted onto Silver mirri card, again die cut with the nesties. Although it doesn't show up well on the photo, there is a layer of white ribbon, with a layer of the black spotty ribbon above it. A bow added and a sprig of pearl beaded branch added for a simple monochromatic card.
The second card is A5 landscape. It has Vanilla coloured card as a background. Then Turquoise BoBunny double dot paper edged with an EK Success punch. The patterned paper is from Basic Grey Jovial, again edged with the EK Success punch. The flower stamp was stamped in versamark and then dusted with Perfect Pearls, this was then heated slightly, as it cooled it was again dusted with the perfect pearls and again heat set. I'm not sure what this does to the image but it makes it really shiny and scrumptious! This then had the corners rounded and was matted onto mirri card, with the rounded corners. Some burgandy Organza ribbon was tied in a bow around the topper and then it was stuck to the card.

All the goodies to make these cards were bought from The Stamp Pad in Saddleworth. I really must stop buying goodies! I am a stashoholic, I am a stashoholic, I am a stashoholic. 

Happy Crafting


Saturday 16 July 2011

Waltzing Mouse #56


Hi There

Well just a quickie from me today.
I have found a holiday, booked, paid for, and been told that it is mine all mine and he will not let to someone else! ! Yay! !

Here is this weeks Waltzing Mouse sketch.
WMSC-56

Here is my take on Waltzing Mouse's sketch for this week.
 I have used a 6x6" scalloped card, the background is purple Bazzill with the corners rounded off. The shimmery paper is by SEI, from the Jolie Chocolate range, with a strip of pink Bazzill. The die is Nesties Labels 4 with a stamp from Waltzing Mouse, Vintage labels 4. This was stamped with Dusty Concord distress inks. The flourishes were also Waltzing Mouse, not sure where the sentiment came from . The card was finished with 6 Card Candi from the Hot Tropics pack.

Happy Crafting

Friday 15 July 2011

A New Stamp

Hi there

Sorry not been about much this week, it has been a strange old week! The caravan we had booked for a week has now become 'unavailable' so have been desparetely looking for another one. With only 2 weeks to go its hard! So no time for crafting!
Still I have made this card with a new Hero Arts Stamp, which I thought was cute.
For this card I stamped the image in versamark onto the pale patterned paper the embossed with clear embossing powder. Then I covered the whole image with Barn Door distress ink. Wiped back over the embossing and a fabby flower popped through the inking! I then used my inverted corner rounder punch to take off the corners. This was matted and layered onto a piece of the pale patterned paper and then a sheet of red glitter paper. The card base was covered with some paper, which is a handmade paper that has a 'rubberised' swirly pattern embossed onto it. A strip of red patterned paper across the middle with a narrow red ribbon. The card was then finished off with a pearl dot in each corner and three tiny pearls in the centre of the flower.
Loving this stamp and need to play some more!

Happy Crafting

Me, I'm off for another internet search for holidays!

Tuesday 12 July 2011

End of School year

Hi There

I just wanted to show you something I made a couple of years ago, I was reminded of it as the reciepient has recently asked for me to make on for her sister.
It is a small book made from when my friends daughter was leaving Primary school. Because the school she was changing too, was some distance away, there were not many from her class in primary going to the same senior school. It is along the lines of an autograph book, with pages so that friends could just sign it or write a message if they so wished.

This is the front of the book, it was made from chipboard and is slightly larger that A6 in size. The covers wer painted with a Gold Acrylic paint.The flowers are Prima Hydrangea with different colours layered together. The Friends Sticker in the middle was an epoxy sticker from an old sheet that I had waiting for the 'right project'. The Silver swirls were peel off stickers that I had, had for quite some time.  

 The inside pages were decorated with stamped swirl images throughout. The title page had a decorative border punched along the edge.

It was bound together with a Bind-It-All and had ribbons and fibers tied onto the BIA rings.

My problem now is she want's me to do a book for her sister, BUT I am not allowed to make it better than hers! ! ! As it is a few years ago, I have learn't new techniques and there is more lovelyness out in the craft shops, Help,

Happy Crafting

Sunday 10 July 2011

More Craftwork Cards

Hello

Well as the title suggests here are some more of the cards made with Craftwork Cards Sweet Meadow collection.

This card was made using a shaped card blank. The bracket edge was folded back and some of the funky paper stuck to this and trimmed to the edge. On the inside back was some pale text paper, sorry it doesn't show up very well. Then one of their die cut toppers, matted onto one of the die cut shapes. A few card candt, a bit of glitter and there you go! The glitter is a bit subtle, just on a few buttons on the paper and around the birthdau message.
This second card was again a 6x6" card. The pale paper was cut from a sheet of the embossed paper. It doesn't show up on the photo but the roses were embossed are are gorgeous in real life. Two banners were trimmed and then cut so that theyadded something to both sides of the card. A die cut tag with pink ribbon through and some card candy top left and bottom right. A touch of stickles and a lovely delicate card. 

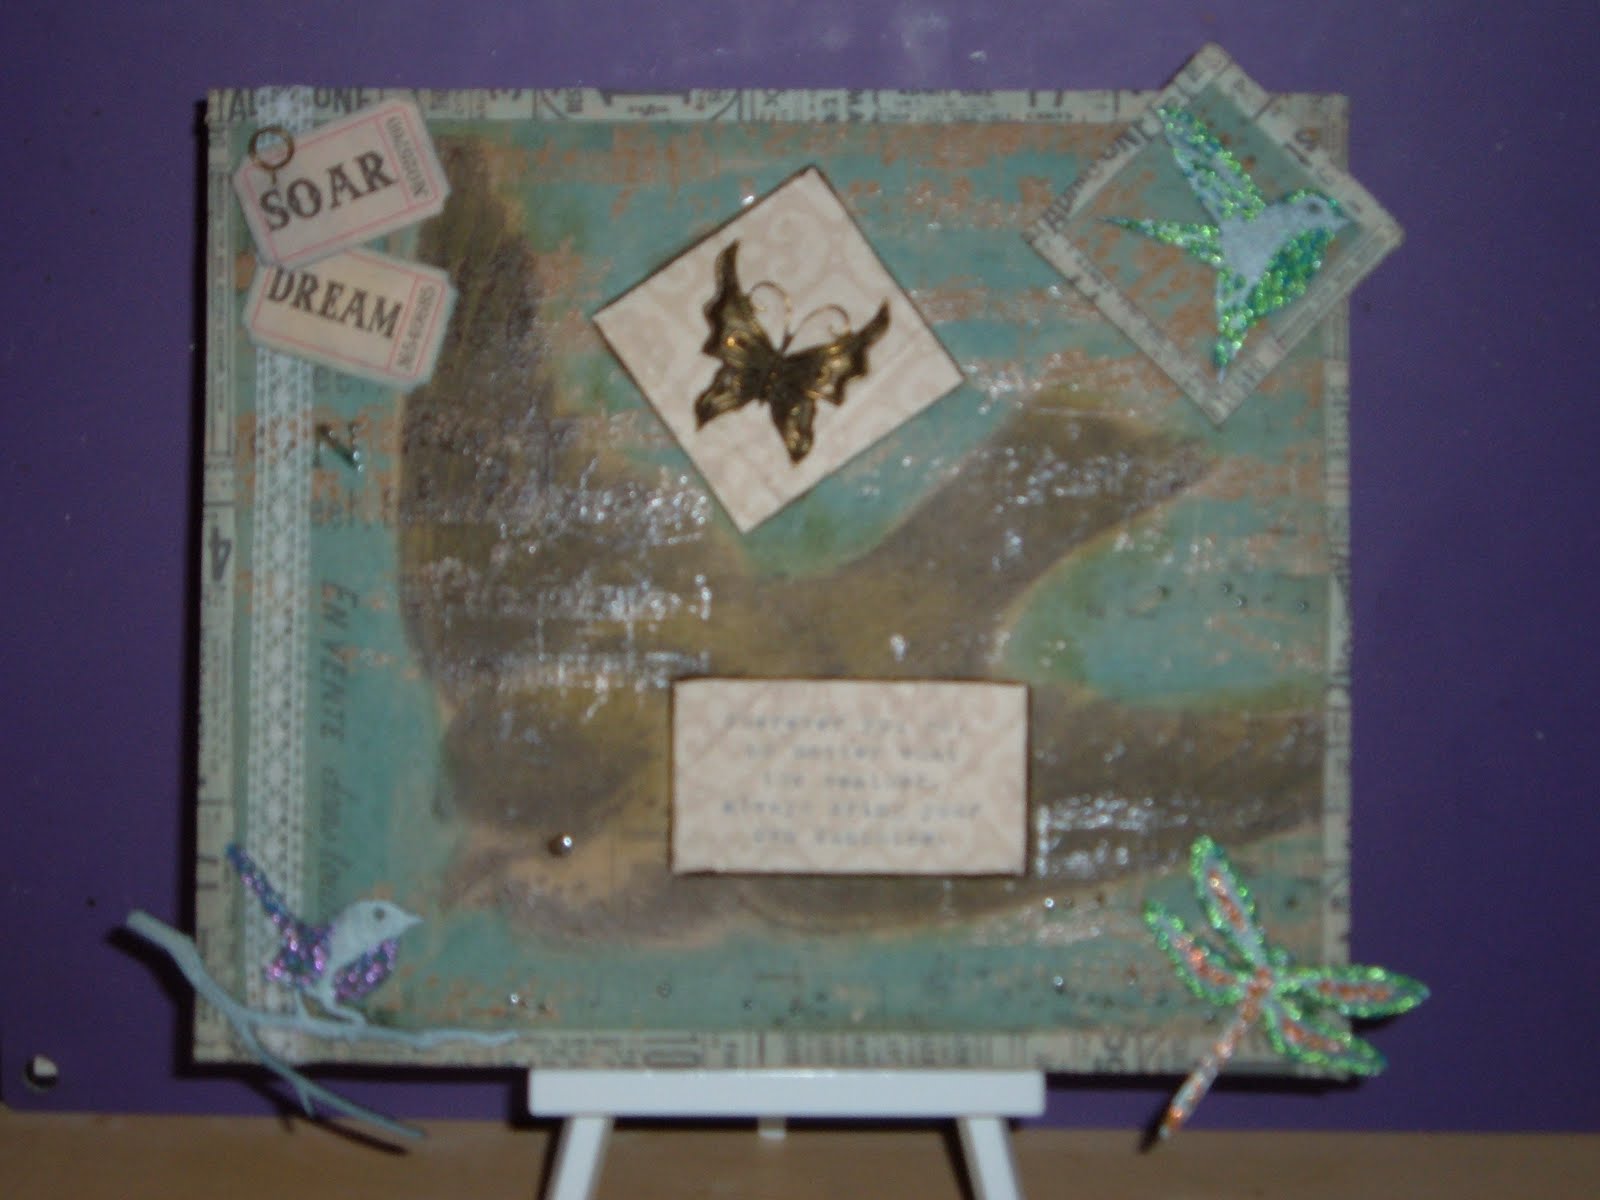
This next card was a slightly smaller 5" square card. The text writing was from the same sheet of backing paper used in one of the cards shown yesterday. The 2 squares at the bottom were again cut from a shet of backing paper and the images glitteres. A sentiment banner, folded to add dimension, and a die cut flower added in top right corner with a card candy and bit of bling! On this card I edged the pieces of backing papers with glitter glue as well.

This last card was done as a standard A6 card. The backing paper was agan trimmed to size, because it is a 8x8" paper, you can get 2 cards along a similar vein from this one sheet. A strip of patterned paper with 3 card candy and a die cut sentiment topper. Stickles glitter glue was added here and there to lift the card. You may have noticed that there are card candy in the centre of the flowers,. but they looked a bit out of sync with the rest of the card, so I doodled on them to make them look like buttons and think this works really well.


Hope you have enjoyed seeing what you can do if you limit yourself to only certain things. Sometime I feel that we can get a bit overwhelmed if, like me you have lots of crafting goodies! Or you have so many tools and punches and spend so much time deciding which one to use, you hardly get any actual crafting done. Maybe there really is somthing in the saying Less is More! 

Once again thanks to Gwen at The Stamp Pad for a fantastic workshop! And more excuses to buy crafting goodies! Like I really needed an excuse!

Happy Crafting


Saturday 9 July 2011

Craftwork Cards

Hi There

I'm up early this morning as I have to get the car packed and get to a Craft Fayre in Oldham today. It is at Oldham Baptist Church from 10;30 til 2pm today. Pop in if you get the chance! It would be great to see you there.

Just to show you some new cards using the Craftwork Cards Sweet Meadow collection.
This first card is a scalloped DL card done lengthways. Some small triangular die cuts in different papers to make some bunting. Where they meet, I have put a card candy. The sentiment strips, again die cut, was folded at each end to give it some dimension and added a bit of interest. A die cut tag was popped on the right hand side. The card was finished off with some faux stitching around the outside edge.
This card was so simple to put together, BUT really effective. The backing paper is from the Sweet meadow paper pack. It was trimmed down to fit the card. A sentiment banner added to the top righthand side of the card and 3 card candy added to this. The hearts were cut from one of the other sheets of paper. Then I found the card was nice but lacking a bit of something, so out came the stickles glue and I stickled the hearts and around the highlights on the roses and that really gave the card the WOW factor.
It's amazing really when you think a card is 'alright' how sometging as small as adding a little bit a glitter can really change it.


Thanks to Gwen at The Stamp Pad for another great workshop with these fabby collections.

Happy Crafting

Friday 8 July 2011

Alcohol !

Hi there

This is to show you some things I have done using Alcohol Inks. Yep, I too thought that alcohol was just for drinking after a bad day at work ! :)
I cut a sheet of A4 acetate down to A6, The I went to town on it using Terracotta, Raisin and wild plum, with a little mettallic gold for good measure. I had just been playing with my Alcohol inks and had this background sheet for a few days wondering what to do with it.

The card is a Craftwork Cards bracket edge card blank, with the bracket bit folded back on itself. I then stuck the acetate under the folded bit and worked out where my topper would be before sticking under there as well.
The stamped image is a Crafters Companion SWALK, coloured with promarkers. This has been die cut with Nesties labels 4 die, cut in my Big Shot, and inked with tattered rose distress inks. The green flourishes were die cut from green bazzill bling using 2 Marrianne Dies. The flowers are from Prima held in place with a faux gem brad.
The backing paper on the inside is just some pale pink paper I have had for a while (you can probably read that as years :rolleyes: ) I punched the edge with an EKSuccess punch and then added 2 more Marrianne flourishes. The blue pearls on the topper were from a Pearl pen which you can squeeze out aas much or a little as you need. The flower on the card was also done with a Lilac pearl pen.

All the products used to make this card were bought from The Stamp Pad in Saddleworth.

Happy Crafting


Edit :- My hubby has just asked me if there is any techniques I havent used on this card. How Rude! !

Thursday 7 July 2011

Something Grungy !

Hi there

This time I thought I would go fo a card which is well out of my normal comfort zone :0
The background is a sheet of brown embossed Coredinations, sanded back to reveal the cream core. The Tag, well, This has metal on the top half which has been embossed through an embossing folder. Then in the bottom right hand corner Terra was applied,which was then heated to produce a bubbly texture. The bottom left hand corner, Ferro paste was added. Black acrylic paint was then sponged all over the tag and wiped off the raised areas on the metal embossing. Then I applied Viva metallic paints over then tag in ramdom blobs on a piece of cut and dry to be able to use sparingly. 
This was a pretty cool technique, for which I thank Gwen at The Stamp Pad for encouraging me to have a go, and showing me what the different things can do. Also for helping me to start to step outside my comfort zone.

Wednesday 6 July 2011

Charity Cards

Hi
Following on from yesterdays post this is a card I made using the left over papers from Saturdays Lili of the Valley challenge card.
This is a 7x5" card, I edged the Pink Bazzill with the Martha Stewart Eyelet Lace border punch set. Then I used the rest of the A4 Lilac glittered paper and cut arount the individual flowers and leaves on the paper to create the border on the left hand side. A Tatty Ted decoupage topper from my 'toppers' box, inked the edge with distress ink and there you go, a card using the bits left from another card!
I am finding this easier as you have already decided on a colour scheme, and lets face it, how many of us crafters have 'bit boxes' of stuff to use 'later', and yet most of us still get out another full sheet of card before checking the 'bit box'!
Hopefully I can keep this up and the charity can help more children.

Happy Crafting

Tuesday 5 July 2011

Nothing to do this Saturday

Hi there,

This is just a heads up for anyone who may be in the area and fancies a mooch around a craft fayre. This is for a good cause and who know you may pick up a bargin or two! I have seen some stuff they have there! It is supposed to be raining all week and right through until next week so why not treat yourself to some crafty goodies!


CRAFT FAIR

SATURDAY JULY 10TH

OLDHAM BAPTIST CHURCH

Chaucer Street, off Union Street

10.30am to 2pm

Craft goods, demonstrations, materials to purchase at modest prices.

Refreshments and light lunches available.

Admission 50p, including coffee/tea.

More Cards

Hello there
Well after getting my Lili of the Valley die cut sheets out recently I decided to do a couple more cards with them. I am having a stall at my friend's Church Craft Fayre this weekend.
These are fairly quick and simple cards which I can do without much brain power, especially when the weather is this hot!

This is a 6x6" scalloped card blank, pale pink backing paper. The topper was die cut using Nesties Labels 5 as was the Pink Bazzill mat. I then took some of the pink Bazzill cardstock and cut out the figure of 8 lace border using a Martha Stewart punch. This is laid on top of some flowery white paper. Not sure if it visibly very well on the photo but i then Glamour Dusted her wings.
I am trying to go with the theory that every time I make a card for myself, a friend etc, I use up the rest of the paper and make a card to donate to Royal Manchester Childrens Hospital. They do such a wonderful job there and look after some very poorly children. Even if by doing this they only make a small amount, it will help all those children and their families at a difficult time.
So far, I have managed 2, but as I only decided on this at the weekend I will keep going.

Happy Crafting

Sunday 3 July 2011

Mojo Monday 197

Hi there

This is the sketch for the Mojo Monday challenge this week.

Here is my card for entry into the Mojo Monday sketch.

The card is a 6" scalloped square card blank. The image is a Lili of the Valley which has been die cut using nesties Labels 2 and then matted onto red bazzill bling cardstock. The flourishes have been cut in green bazzill bling with Marianne Dies, cut with my big shot.  A square of backing paper with the corners rounded and then inked with Distredd inks.Two prima Got flowers layerd up and secured with a brad and an organza bow to finish it off

Saturday 2 July 2011

Lili of the Valley

Hi There

This is my entry for this weeks Lili of the Valley challenge. The challenge was Celebrate.
The card is a 7x5" card, flower fairy image, die cut with Nesties labels 18. Matted onto purple bazzill, again cut with nesties labels 18 on my big shot. The paper was some A4 paper I recieved as a gift, and I didn't know what to do with it. The glittered flowers were down both sides and along the bottom, which would be great if I scrapped in A4. So I cut the paper from tthe bottom left hand corner, then using the glittered butterfly from the top of that sheet I cut it out and shaped it to go on top of the card. The pearls on the card are made from an amazing pearl pen that you can use just for dots, lines, squiggles or anything else you can think of!
Again the backing paper was matted onto purple bazzill.
I had ideas of using my border pounches and sticking flowers on, but in the end took them off as I didn't feel it needed them. I guess sometimes less really is better!

Friday 1 July 2011

Nestie playing

Hi There
 I have been playing with my nesties and trying to have a go at getting some of my image outside the bulk of the die.
Not quite mastered it yet, but getting close. Here are my first two attempts.
This one has been donw using Nesties Labels 10 die.The image is from Crafters Companions SWALK, coloured in with my promarkers.

Same image, this time cut with Nestis mega curved rectangles. Still need to work out the finer details but will have another go at the weekend. I guess they are not too bad for a first attempt. But definately need more practice.