Showing posts with label First Edition. Show all posts

Friday, 5 August 2016

More Pretty Posy

Good morning

Today I would like to share with you two more cards made with the First Edition 'Pretty Posy' Paper pad.
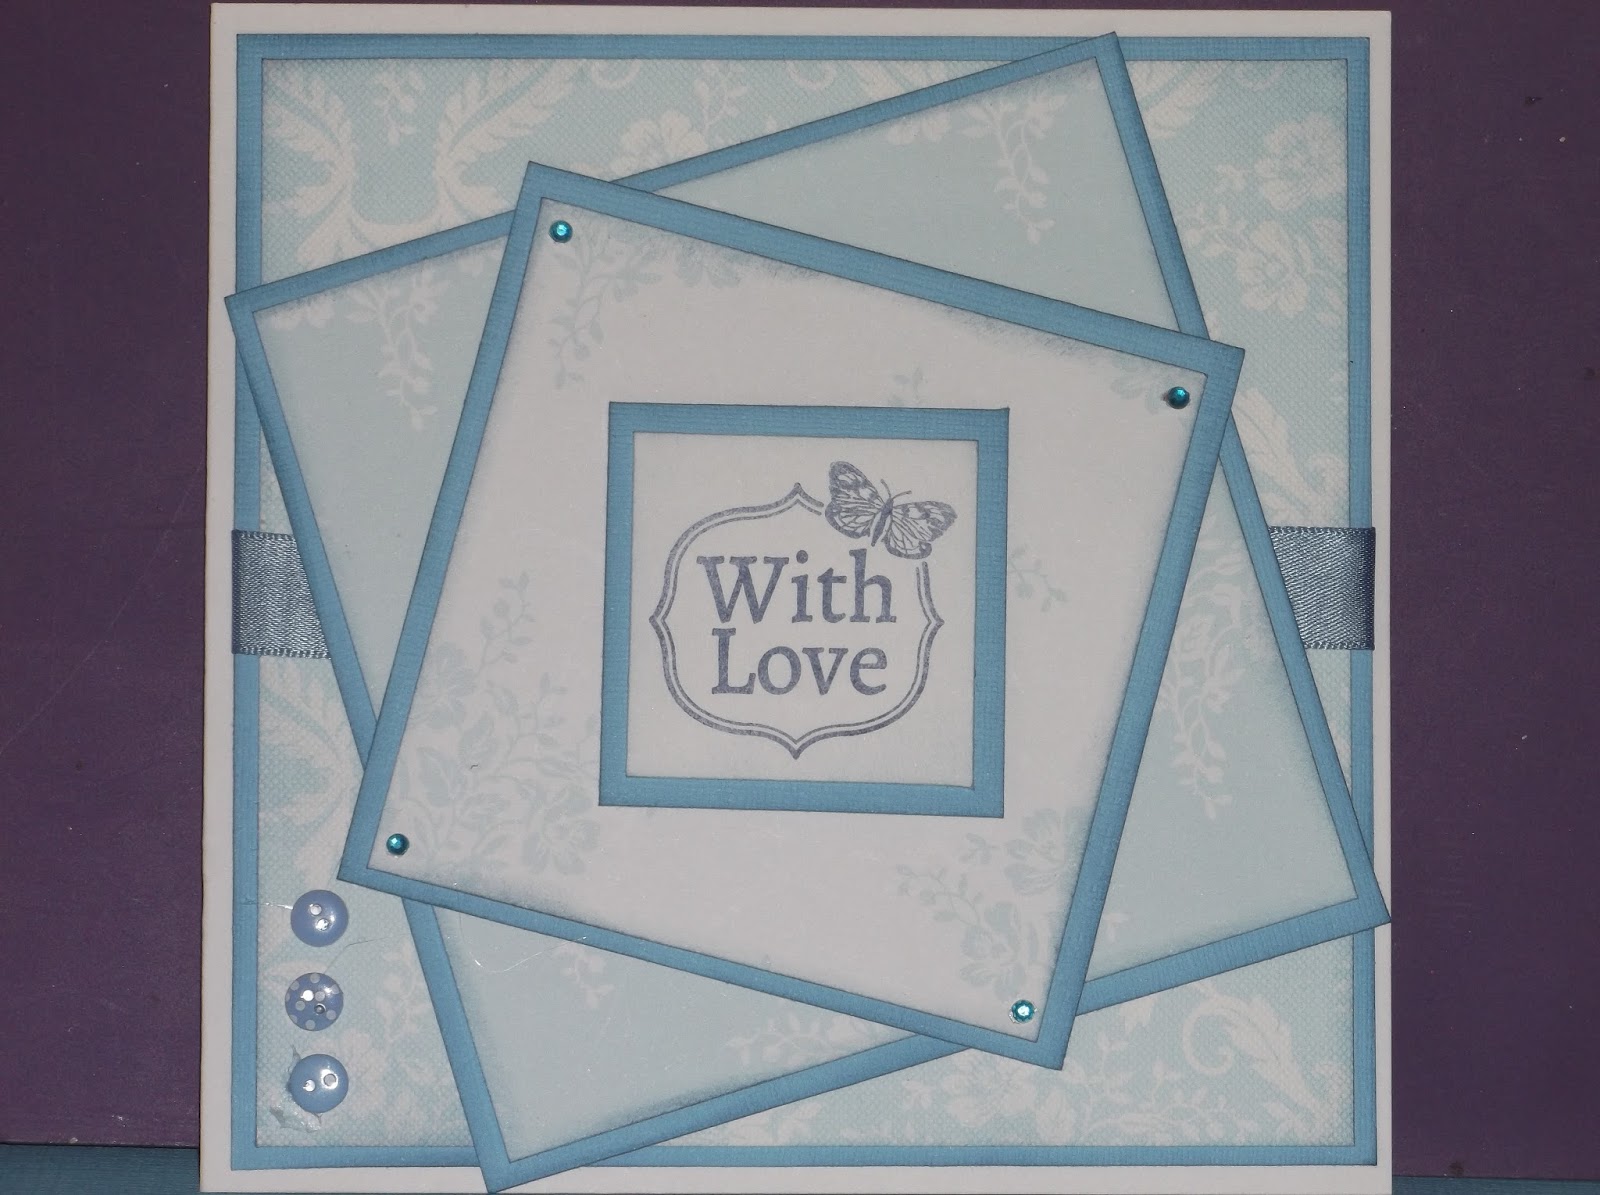


This first card was made using just the papers with blue in it.
I cut the card into reducing sized squares.
Then I matted them all onto Blue cardstock.
Instead of layering them straight, I have twisted them for a bit more interest.
I wrapped blue organza ribbon around the base layer.
The stamped sentiment was stamped with Denim Adirondak ink.
Three small blue buttons in the bottom left hand corner.
A small blue gem in each corner of the third layer to finish the card.


For this card I again used a 6x6" card blank.
This time I cut two layers from the red pages of the pad.
I then cut a strip of white paper with the red circles on.
The I fussy cut one of the hearts out of the paper.
This was them mounted onto a foam pad and put onto a square of white card.
I then matted all the layers onto red card stock.
A added a small gem in each corner of the layers.

Thanks for stopping by. 
I appreciate all comments you may have on my creations.

Gill

Saturday, 30 July 2016

Pretty Posy Cards

Good morning

 Today I would like to share with you three cards I made using the First Edition Pretty Posy Papeer pad. I have made these using only the papers and no toppers!

All three cards have been made using 6x6" card bases.


For this first card I used the Pink lattice paper, as the background.
Then a section of the blue floral paper.
Then a small offcut of the white heart papers.
A small length of the stripy paper.
All these papers were layered onto pick cardstock.
Some pink organza ribbon was wrapped around the striped panel.
The stamp used was from the Floral Muse collection.
Three small gems in the top left and bottom right finish the card off.


For this second card I used a large square of the striped card.
Backed this onto pink card.
When I cut the blue floral papers I accidentally cut it too small.
So I divided into four squares onto the pink card.
I then wrapped the pink organza ribbon around this panel and tied a bow.
Small gems in each corner to finish.


For this last card I decided not to stay clean and simple.
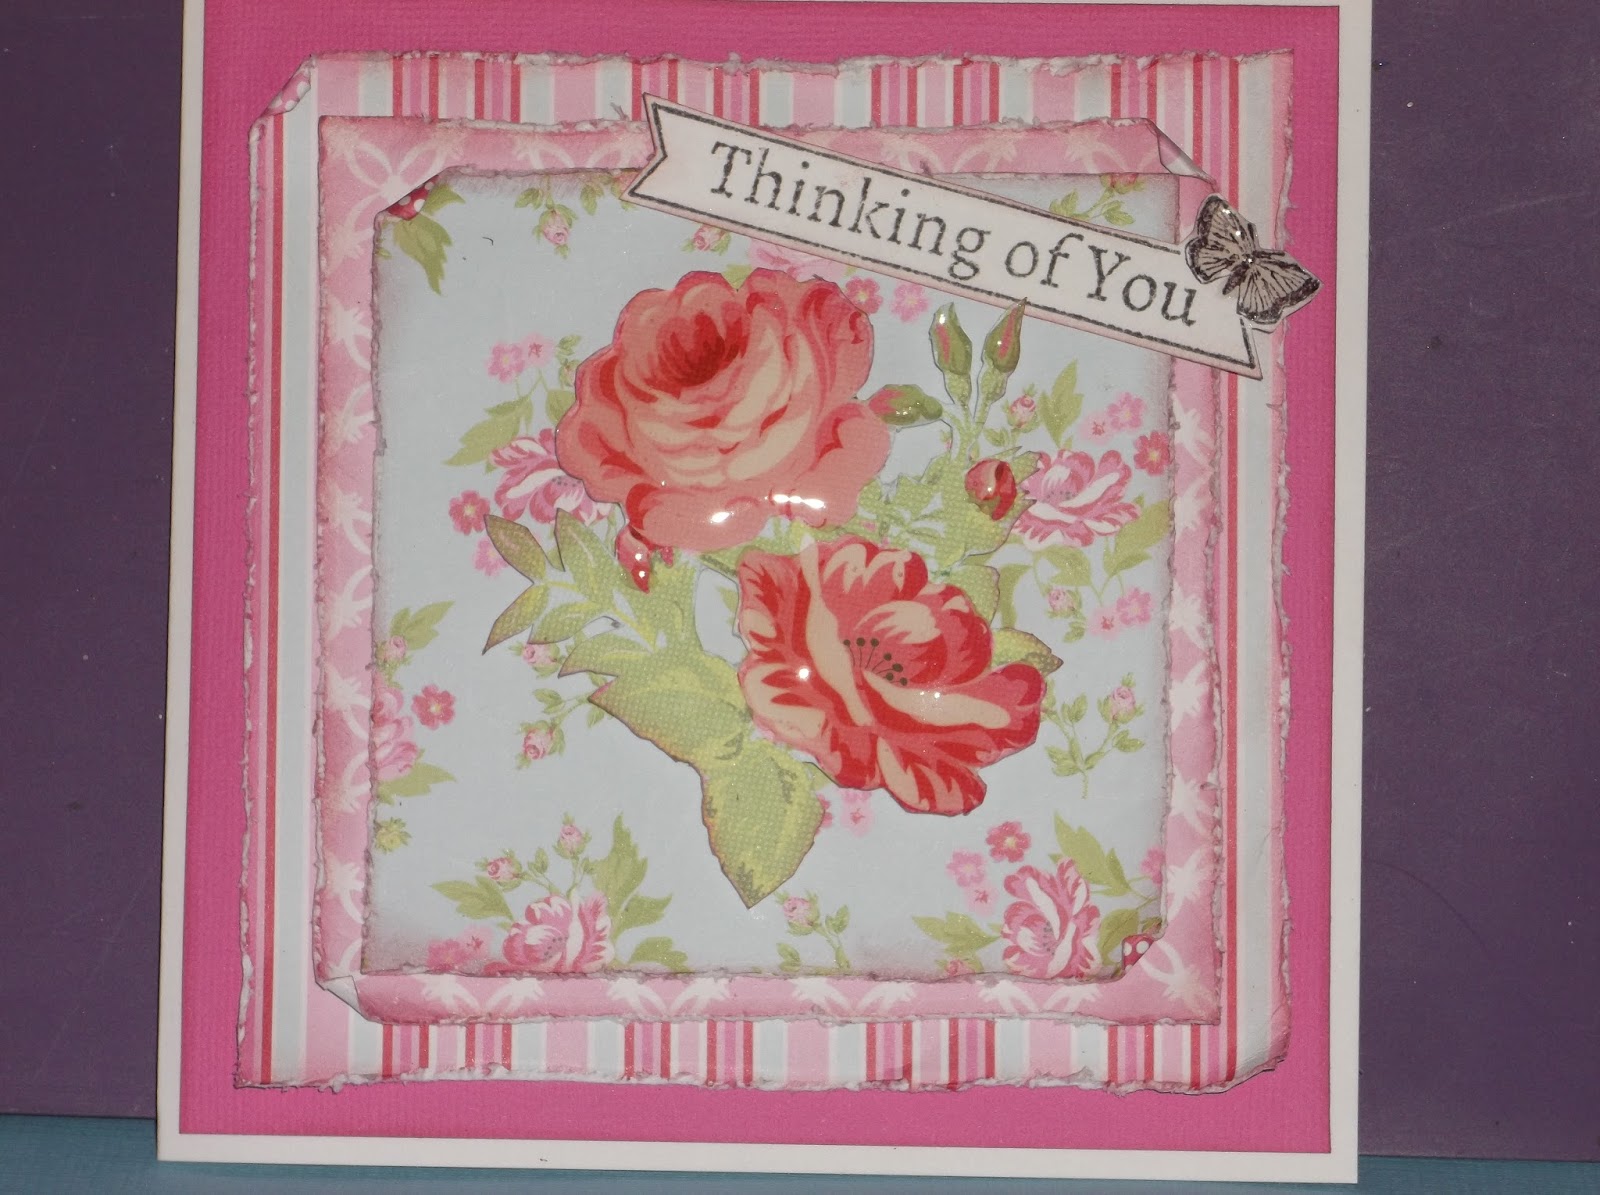
So I cut a piece of pink cardstock slightly smaller than the card base.
I then cut a square of the stripy paper.
A square of the pink lattice paper.
Then a square of the blue floral paper.
On each of these I inked the edges using Frayed Burlap Distress Ink.
All these edges were then distressed using a distress tool 
(you can also used your scissors to get the same effect).
I fussy cut the large roses from the papers, and then highlighted them with Glossy Accents.
This was then raised up from the card with foam pads.
The sentiment was stamped in Frayed Burlap with the butterfly coloured in Victorian Velvet.
(This stamp is from the Floral Muse collection.)

Thanks for stopping by. 
I appreciate all comments you may have on my creations.

Gill

Thursday, 5 June 2014

Little Boys!


Good Morning

Today I would like to share with you two cards I have made for the younger boys in our life!
These are two of my favourite images from Elisabeth Bell, for Hobby House.


This first card is a 6x6" card base.
The papers are from First Edition Man Made.
The railway papers worked so well with this image of a little boy and his train set.
I matted the paper and image onto green then red bazzill card stock.
The Play and Story tickets are by Tim Holtz
What big boy didn't want to be train driver when he grew up??


The next card is also a 6x6" card base.
This time I have gone for kraft brown for my matting and layering.
The papers are from the Wellington Range
A nail head sticker in the corners and there we have another card.


Thanks for stopping by. 
I appreciate all comments you may have on my creations.

Gill

Friday, 28 June 2013

A Card from Me

Good Morning

Today I would like to share with you a card I have made.


This is a 6x6" card blank cut from a sheet of Bazzill cardstock.
This was a quick card to make.
The image is from a die cut topper sheet from Lili of the Valley.
The papers are from First Edition Paper Pad - Boho Chic.
The layers are matted on the the rest of the Bazzill cardstock. 
I found this made the whole card work together.

Thanks for stopping by. 
I appreciate all comments you may have on my creations.

Gill
Tuesday, 25 June 2013

A card for Mum

Good Morning 

I don't know about you, but with all the cards recently for Dad's for Fathers day I have decided to show a card for Mum's, Just because I can and I don't think I could function with out having my mum at the end of the phone :)


 This is a 7x5" card blank.
The image is from Lili of the Valley - Teddy for Mum.
Coloured in with Promarkers.
The backing paper is from the First Edition Pad - Love Letters.
The image was then die cut using a Marianne die, 
Inked throught the die with Victoria Velvet Distress Ink.

Quite a simple and straightforward card to make, but I love it :)

Thanks for stopping by. 
I appreciate all comments you may have on my creations.

Gill


Thursday, 20 June 2013

Lili's Little Faires

 Good Morning

Today I would like to share with you a card made for the latest challenge over at Lili's Little Fairies. I love this challenge as it gives me chance to play with my (Few!) Lili of the Valley stamps.


This card is a 7x5" card blank used landscape.
The stamp is Bumble Bee Fairy.
The was stamped and coloured with Promarkers.
Then Die cut using nesties Labels 30.
Whilst still in the die, I inked with Rusty Hinge Distress.
The paper for this card is from a First Edition Paper Pad.

Thanks for stopping by. 
I appreciate all comments you may have on my creations.

Gill

Sunday, 28 April 2013

Hello

Hi There

Wow where did that week go???

Todays card which I am going to share with you is a Lili of the Valley one.


This is a 6x6" card blank.
Both the papers are from First Edition Boho Chic.
The Image is Fairy and Bumble Bee from Lili of the Valley.
Coloured with Promarkers.
Inked through the die with Distress Inks.
Die cut with Nesties Labels 26.
Flowers and leaves from Wild Orchid Crafts.

I would like to enter this card into this weeks Lili of the Valley Challenge.
Also this weeks The Cutie Pie Challenge.


Thanks for stopping by. 
I appreciate all comments you may have on my creations.

Gill

Wednesday, 17 April 2013

More Fathers Day

Good Morning

Well today I would like to share with you the rest of the cards I made up using the die cut toppers I found during my tidy up.
 Again all the cards have been made using 7x5" card blanks.


This card was quite simple to make. The checked paper was cut and matted onto the blue cardstock Then the decoupaged image was also matted onto the same blue card stock.
There is room for a sentiment at the bottom if needed.


 This second card was also very simple. The stripy paper was matted ontothe blus bazzil card. The I die cut a Nesties Labels 11 to put the topper onto.
Again there is room for a sentiment if needed.


For this card I really was using the scraps :) So I die cut a nesties Labels 11 from the stripy paper and then the next  size up from Kraft brown card. Then I matted a long thin strip onto Kraft brown (I had run out of the blue card !) from my bit box. Stuck this down the left hand side. 
Matted a rectangle of the checked paper also onto Kraft brown and placed this just below half way. I then attached the topper onto the stripy nestie and then onto the Kraft brown Nestie. 
As I had no more Forever Friends toppers left, I used a Tatty Ted one instead.
Then I added 6 brown Card Candi's to the card in the corners.


My last Forever Friends Topper was a square one and didn't fit onto a 7x5" card. 
So with this one I used a 6x6" card blank. By now I had run out of both the stripy and checked papers.
 So I used a sheet from First Edition Boho Chic. This had a fabby wood effect on it and seemed just right for the image. I matted this onto some scraps I had of the peachy/pink paper from the same pad. Again I used strips of the same papers to make the added detailed strips on the left hand side and across the bottom.
To finish I added 3 candy dots top left and bottom right.
There is room for a sentiment if needed later.

Thanks for stopping by. 
I appreciate all comments you may have on my creations.

Gill

Sunday, 14 April 2013

Sneek Peek

Good Morning 

Today I am giving you a sneek peek of the card which I think will be hubbies birthday card, for later on this week. That is unless I change my mind, again, and do a new one :)


This is 7x5" card blank.
The paper is from First Edition Love Letters paper pad.
The image is a die cut decoupage Tatty Ted.
The frame was die cut with the Frame Die from Cheery Lynn.
The paper for the frame is also from Love Letters.
Sentiment from the decoupage set and matted onto coordinating paper.


Thanks for stopping by. 
I appreciate all comments you may have on my creations.

Gill

Thursday, 11 April 2013

Clean & Simple

Good Morning

Today I would like to share with you a 'Clean and Simple' card which I have made for this weeks Lili of the Valley Challenge.


For this card I used a 6x6" card base cut from Green Bazzil Bling. 
The papers are from First Edition Boho Chic. 
The image is one of Lili of the Valleys Die cut sheets - Thistledown Fairy
The papers have all been backed onto the same Bazzill Bling card.
Although it is supposed to be Clean and Simple I did add some fine glitter to her wings.

I would like to enter this into Lili of the Valley challenge Clean and Simple

Thanks for stopping by. 
I appreciate all comments you may have on my creations.

Gill

Sunday, 7 April 2013

Weekend Card

Good Morning

Today I would like to share with you a card I have recently made in readiness for my mums birthday at the end of April. I know I am never normally this organised :)


This is a 6x6" square card blank cut from Bazzill cardstock.
The backing paper of from Kaisercraft Forget Me Knot papers.
The image is Lili of the Valley.
Stamped and coloured with Promarkers.
This was then Die cut using Nesties Labels 11.
The paper under the image is from a First Edition Pad, Boho Chic.
The strip down the left hand side is made from the card, a strip of the backing paper 
and a strip of the paper the same as used for the mat under the image.
The gems top left and bottom right are by Kanban.
The ribbon was from my stash (I think by Rico)

Ooops just noticed that I haven't stamped the Happy Birthday, better do that now.

I would like to enter this card into the Cutie Pie Challenge, Favourite Film, 
My fav film is Mamma Mia, so Mamma / Mum ?? or is this pushing it a bit smile.gif


Thanks for stopping by. 
I appreciate all comments you may have on my creations.

Gill

Sunday, 10 March 2013

Follow Up

Good Morning

Last week I blogged about how I make a card up, and the steps to take which get me to the final card.
The Blog post is here. So carrying on from this I would like to show you another card made using the same paper stack, First Edition's Deset Blooms.


This card is a more neutral card, OK then not in your face girly! 
The background paper was a peachy coloured glittered one. 
I made the card using Kraft brown for the 7x5 card blank. 
I took the contrasting stripy paper from the same pad and matted this onto Kraft. 
There is ribbon on the stripy sections, but it is a pale organza with a peach edging.
The flower is made from a Marianne die using the same ribbon.
This time instead of an image I have stamped a phrase, Tim Holtz stamp.
This was die cut with a Marianne Ovals Die.
Again the swirls were die cut from a Marianne Die.

I hope this helps you to see how this idea can be adapted for lots of cards for different occassions.

Thanks for stopping by. 
I appreciate all comments you may have on my creations.

Gill

Wednesday, 6 March 2013

Mothers Day Card

Good Morning

Today I would like to share with you a card made for Mothers Day.
This fabby card is a 6x6" card.


The cark blank was cut from a Terracotta Bazzill card.
The stamp is  'Teddy for Mum' from Lili of the Valley.
The image was coloured with my Promarkers.
This was die cut with Nesties Lables 23.
The background papers are from First Edition Boho Chic.
The flowers are from Wild Orchid Crafts.
Flourish die cut from Memory Box Lavish Flourish.
Brown Spotty ribbon from my stash.


Thanks for stopping by. 
I appreciate all comments you may have on my creations.

Gill

Thursday, 28 February 2013

Lili of the Valley Wedding Card

Good morning 

Hmmmm, Not sure where yesterdays post went, its not even in drafts, so will have to sort that our later :)

Today I would like to share with you a card I have made for the Lili of the Valley Lili's Little Fairies Challenge. This week the challenge was 'Peaches and Cream'.

I have made an 8x8" scalloped edge Wedding Card. 


The backing paper is from the First Edition pad J'Adore. 
The image is the Wedding Couple stamp from Lili of the Valley.
This was coloured with Promarkers.
The Die cut using Spellbinders Fleur De Lis Rectangles.
The paper behind the image is from Lili of the Valley Country Ladie paper pad.
The gorgeous Lace was from my stash, al;thoug I gently inked it with Tea Die Distress Ink.
The flowers were from Wild Orchid Crafts. 
Finally the Butterfly was from Prima. This was inked gently with Tea Die distress Ink as I felt it was too Stark White on the card.


I would like to enter this card into the Lilis Little Fairies Challenge - Peaches and Cream
and also the Cutie Pie Challenge - Pastel Colours.


Thanks for stopping by. 
I appreciate all comments you may have on my creations.

Gill

Sunday, 17 February 2013

A stamp from Nellies

Good morning

Today I would like to share with you a card made with a new stamp from the Dawn's Stamps collection from Nellie Snellen.

The card is a 6x6" square, the backing paper is from First Edition Spring Feast pad. The image was then die cut useing nesties labels 26 and was supposed to have been matted onto a larger Labels 26 in pink. Only problem being, I die cut the wrong size, so I turned it through 90 degrees and now I think I prefer it. The flourish if one of the Marianne Dies as is the circle at the top left hand side. 


The sentiment is from a stamp set by Kaisercraft stamoed onto the smallest Labels 26 die.


Thanks for stopping by. 
I appreciate all comments you may have on my creations.

Gill


All the dies, paper and stamps are available from The Stamp Pad

Friday, 15 February 2013

Valentines Day

Good morning 

Today I would like to share with you the Valentines card I made for my hubby. 

This was a 6x6" card blank. The papers are from First Edition pad, Love Letters.


The stamped image is from Lili of the Valley, this one is called The Love Balloon. I coloured this with my promarkers. It ws then die cut using nesties Label 26, as was the mat underneath. I then used the same papers to layer up the left hand side.

The sentiment is from Lili of the Valley, it reads, Wishing you a World full of Joy. The lace was from my stash.

I hope he likes this, if not, I'm not making another one :)


Thanks for stopping by. 
I appreciate all comments you may have on my creations.

Gill


Wednesday, 30 January 2013

Class cards

Good morning

Today I would like to share a couple of card with you which I made during a workshop at The Stamp Pad, Greenfield. The workshop was based around making 3 cards using just one paper stack to make them all.
The paper stack we used was Dreamcatcher from First Edition.


The first card is an A6 card blank which opens sideways. It was made with brown kraft card, we then used two complementary pink and white papers from the pack. The smaller mat was layered onto kraft brown. We then punched corcles and scalloped circles to put on the front. The ribbon at the bottom is actually a piece of cardstock which was embossed with Swiss Dots embossing folder and then folded to make the ribbon effect. The card was then embellished with three buttons and some pink gems.


The second card was made from a White DL card blank. For this card we simply took two complemtary pieces of the paper pad, pinched some pearl paper with a border punch and attached together, The flourish was cut with a Marianne die from silver Mirri card. The greeting is from a pack by Craftwork Cards which has been trimmed to size.The ribbon slider is also from Craftwork Cards, through this we threaded some purple ribbon. We then added three purple roses, two to the message and one on the ribbon slider.


For this last card was again used an A6 card, but his time it was a tent fold card. We then simply took three corresponding pages from teh pad and pinched the edges with different border punches. These were then layer up so you could see the borders at the bottom. The main panel was die cut with a ne set of dies from CartUs. The message was stamped and then we used double sided sticky peel offs and foils to give the bumble bee image. This was a bit fiddly but well worth it.
Some ribbon tied around the top and the card was done :)

I really enjoyed this workshop and it was lovely to see friends old and new. It has also got my mojo back up and running! I am off to dig out some of my other First Edition Pads to have a play :)


Thanks for stopping by. 
I appreciate all comments you may have on my creations.

Gill

Tuesday, 29 January 2013

Another Cute Birthday Card

Good Morning

Today I would like to share with you another card featuring the little girl with a birthday cake.


Again I have used a 6" square card blank.
The backing papers are from the First Edition Pad Summer Breeze. I have used a pink paper with brown flowers and white stripes which is glittered. The image is from Dawn's Stamps. It was stamped with black Memento ink and coloured with my Promarkers. This was then dies cut using Nesties Labels 23. I then die cut another Labels 23 in brown the next size up. I wrapped some brown spotty ribbon aroung tha backing paper and tied a knot to the right hand side.
I layered a heart shaped doily under teh image at the top left.
The sentiment is by Lili of the Valley stamped in brown Brilliance and die cut with nesties scalloped circles die.

I hope you like this second take on the stamp.


Thanks for stopping by. 
I appreciate all comments you may have on my creations.

Gill

Sunday, 27 January 2013

New Nellies Stamps

Good morning

Today I would like to share with you a card I have made using the new stamp from Dawn's Stamps, part of Nellie Snellen. This one is a little girl with a Birthday Cake.


This card is sone a a 6x6" card blank. The image was stamped in Black Memento ink and then coloured in with my Promarkers. This was then die cut with Nesties Label 18 on my Big Shot. The image was then gently inked through the die with Worn Lipstick Distress Inks. The backing paper is from the Summer Breeze paper pad from First Edition.

The image was then layered onto a pink labels 18 and a brown labels 18. Both of these sheets came from the same pad and match beautifully. The flourishes are cut from the same brown paper with the D-Lites Flourish 2.
The sentiment is from Lili of the Vally and has been stamped in Brown ink and then die cut with scalloped circles nesties.

I hope you like this creation.

 Thanks for stopping by. 
I appreciate all comments you may have on my creations.

Gill

Friday, 23 November 2012

Desk Calender

Good Morning

Today I would like to share with you a samll desk calender which I made for the upcoming Christmas Fair for Francis House Chidrens Hospice.


These cute little claenders are really easy and fairly quick to make. You start off with at A5 piece of coloured card and then score at 2, 4, 6cm and then at 15cm. This then folds to made the base of the calender and then is is just a case of decorating and putting a calender on it. I used the First Edition New Leaf pad and then a Simply Creative 3d Sticker flower.
Once I had worked out the measurements they were quite quick, and very effective.


Thanks for stopping by. 
I appreciate all comments you may have on my creations.

Gill