Showing posts with label Inka-Gold. Show all posts

Monday, 28 November 2011

Another Altered Box

Hello

This is a box  which I altered for my friends birthday.
The box was a Kraft backed box which  I covered with InkaGold in this gorgeous pink color. The papers are from SEI Juliette. I didn't have the full range of papers as I had used them to do a book for my Mum's 60th Birthday, But as the box is only 5" square I had plenty from my off cuts and the rub ons and epoxy stickers.
The back of the front page I left plain with just the Inkagold. This was because I found  cutting out the aperture was not as easy as I had thought :).
The back cover was covered with another paper from the range. What I forgot to take a photo of is the front of this page. This is the bit which shows through the aperture on the front. for this I spent quite a bit of time working out what would show through the aperture. 
I finally settled on a paper with large flowers on it. I then trimmed it so that I got the best view of the flower through the cover. The grey strip down the left hand side is from the sticker sheet and the two epoxy stickers are also from the matching packs.
All the goodies to make this were bought from The Stamp Pad, Saddleworth.

Happy Crafting

Wednesday, 27 July 2011

Foam Board Project

Hi there

A few days ago I showed a project I had made on a workshop using Kraft Resist paper and foamboard. Well I have had a play and made another one, without Julie's help. It was a little scary at first, I was worried I would cut the foamboard in the wrong place or the paper. But it is only paper and I had some more!
Again the foamboard project was done landscape. This time the butterfly paper was used and inked all over with distress inks in victorian velvet, mustard seed and dried marigold. Edged with tissue tape, the tickets and lace were all inked to match.
 A stamped butterfly, from Elusive Images fills the top recess with a small dragonfly charm at the bottom right. The foamboard from here was covered and tissue taped as before. The I cut a butterfly from the rest of the 12x12 paper, this was then covered with Diamond Glaze and left to set. This gives the butterfly an epoxy type covering.
The foam board in the other recess was trimmed down so that if fitted back in the recess, leaving a small gap around three sides and a larger one at the bottom. The saying was stamped and embossed in black onto some paper, left over from another project. This was then wrapped around the foamboard and stuck into place. There is no truth in the rumor by my hubby that this was done to cover up some wonky stamping! Well there is a bit on dodge stamping underneath!
The main butterfly was glittered using stickles in Icicle, which I spread with my fingers, and the top butterfly was done using distress stickles in Rock Candy. The bird at the bottom was covered with grey Inka Gold and then covered using Accent Beads.

Tuesday, 26 July 2011

End of School Year - Part 2

Hi There

Some of you may remember the daughter of a friend of mine requested an autograph book for when she left Primary School to go to Senior School.
Well this is my finished article. I had to try and not go over the top as her big sister didn't want me to make it better then hers!

This is the front of her book. It was 6x4" greyboard, covered with red Inka-Gold. The 2 large flowers were from a set by Bobunny. The square in the middle is a tag by Making Memories, with 3 rub ons by Kaisercraft. The swirls are peel offs. The book was bound together using my Bind it All and ribbons and fibres ties around the wires.

The inside Cover was stamped using Distress inks in Victorian Velvet and spun sugar. The stamps are by Inkadinkadoo,  Artistic Flourish and Gem Stone Flourish.

The inside pages were all stamped onto, leaving enough room for all the messages from her friends.


This is the finished book, she was delighted with it when I saw her at the weekend. A lasting reminder of friends she was at Primary School with. Better than them signing her shirt! 

Happy Crafting

Monday, 25 July 2011

Hi There

Hi

Sorry for no posting last week, life seems to have got in the way of crafting in the last week or so!
Any way, I thought I would share with you a project I made at a recent workshop at The Stamp Pad in Saddleworth. The workshop was run by the Fabby Julie, for those of you who don't Julie, she does amazing stuff but isn't very 'pretty and girly' in her crafting.
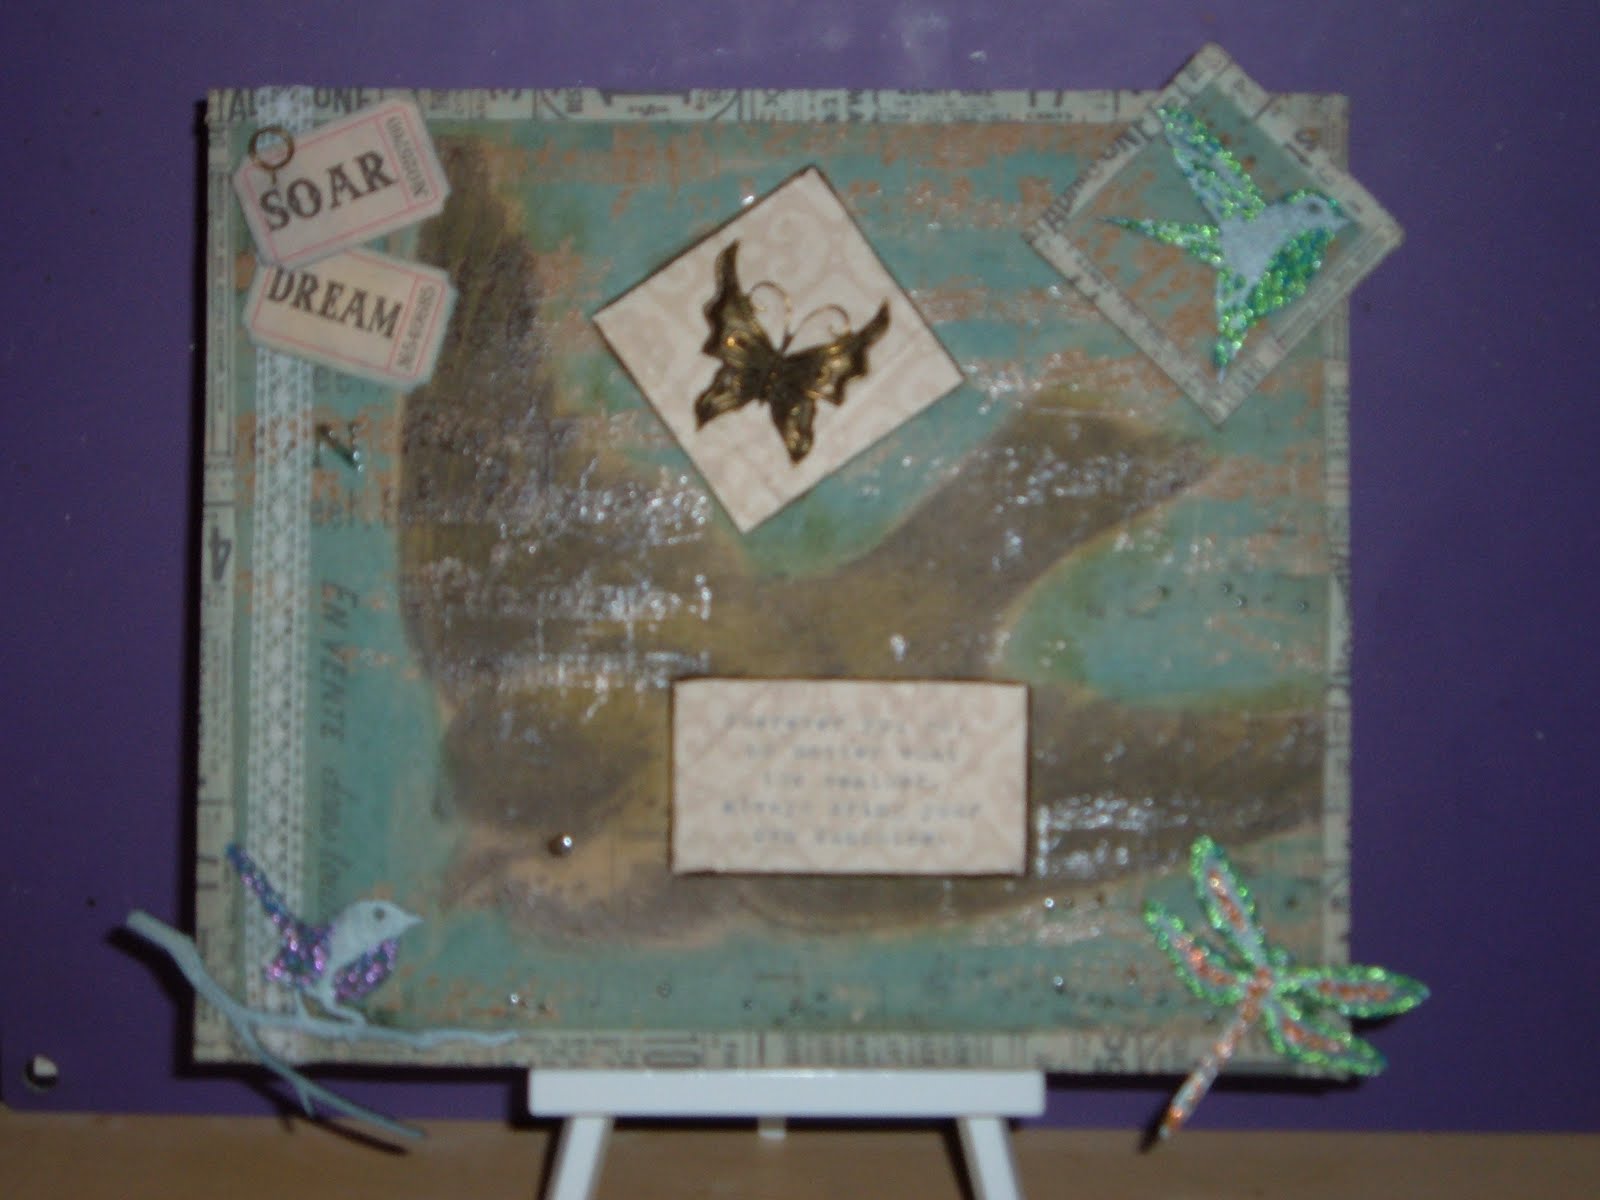
This was made with a piece of Foamboard. The paper is from Tim Holtz Kraft Resist Pad. The background was coloured with Distress Stains in Broken China then I inked the bird with normal distress inks. The 2 recesses were cut out of the foamboard before the paper was attached, then the hole were re-cut in the paper. Before the backing paper was applied, I stamped my quote which appears in the bottom recess.

The square foamboard which was taken from the top was covered with some of the off cut from the12x12 paper. The edges of this, and the edges of the main piece were then finished off with Tim's Tissue Tape. Once stuck in place this was inked to tone in with the rest of the project.


The butterfly in the top recess was a metal embellishment, the two birds and butterfly were wooden embellishments covered with Dark grey Inka Gold, then some Accent Beads added.Some lace ribbon down the left hand side and two tickets from Tim Holtz, These were all inked to tone in and then the tickets were attached with a Tim, Memo pin.


I really wasn't sure about this when it was finished, but it has really grown on me. So much so that  I have made another one! But that is for another time :)

Wednesday, 1 June 2011

Kaisercraft

Good morning

Over the past few days I have been playing with a Kaisercraft Mini Book and Stand, I bought these from The Stamp Pad. But any Kaisercraft stocking shop should have them.

First I painted the stand with a metallic paint (from B&Q), but this seemed to take forever to get a good coat and dry. When it came to painting the actual books I decided to use some Inka-Gold metallic gloss paint. This is amazing stuff as a little goes a long way. You appy it with a sponge or piece of cut and dry, it's creamy not a liquid and gives fantastic coverage with only the smallest amount. Its very quick and easy to apply.
 Then I spent a good few hours to choose my papers! ! I just kept finding more! I eventually went with some papers from BoBunny 'Blast Off', Prima 'My Little Guy' and Prima 'Hello Spaceboy'. I used the 6x6" paper pads as the designs on them were just the right size.
For the circular book I used my EK Success Circle Scissor to cut the circles (only to find out the chipboard isn't actuall circular but slightly oval!). I stuck paper on one side, them remember to repunch your holes before you stick the other side on, otherwise you won't know where the holes are supposed to go. Can you guess what I did? !?
For this book I simply measured the size of the book and cut them square and then rounded the corners off.
For this book I did wonder how I was going to cut the papers?? Even to the point where I asked my dear hubby if he could scan the books and scale them down on his laptop so I could then print it and make a template to draw around! Then I suddenly remembered my Nesties Labels 1. They are a great match and much easier to cut then using scissors!
Here is my completed books and stand. Now all I need to do is to pick the photos to go inside! However as they are small (approx 3") I can use those photos we all have where my boys look fab but there is a tree or something in the background that you just don't want there, now I can chop it out.

Hope you like this project, I really do appreciate you comments.

Happy Crafting