Monday, 18 November 2013

A Crafty Weekend

Hi there

Well I know it has been a while since I blogged but life has this nasty habit of getting in the way! 
Last weekend I was lucky enough to go on a crafty retreat run by Gwen at The Stamp Pad,  Saddleworth. If you ever get the chance to go to this wonderful part of the country please go, you will not be disappointed, unless you get snowed in!

The first project which I would like to share with you is one using Tando Creative arches. In the pack you get a back board and then three sets of arches with the insides die cut out. For this project we only used the back board, one set of arches and insides and one set of arches on their own.


With the inside panels we stuck cotton wool on to give the finished project some texture and padding. We then used transfer paper to transfer the images onto fabric. This fabric was then trimmed down and stuck toI the back of the inner panels. This was then attached to the back panel, the section with the frame and padded insides was then attached, before finally the frame on its own was attached. The frames and back boards were painted with burnt sienna acrylic paint, and then treated with Weathered Wool medium and left overnight. After leaving overnight the project had a wooded texture to it. We then added some brown Stazon ink in some areas. 
We then added small amounts of pva glue in random places to adhere building flakes to the project. 

I hope you have enjoyed this project.

Friday, 18 October 2013

More Lili of the Valley

Good Morning

Today I would like to share with you another project I made during my recent day out at Lili of the Valley.

This is a hanging decoration which could be altered to suit any time of the year.


The top section was a 6x6" Kraft card base. 
Covered with Tartan type paper from the Classic Christmas Paper Pad, which was matted onto Red card
A Doily was added to the centre.
Then a Window shape was cut with a Memory Box die.
Behind this was put a piece of red card which had punched along the edge. 
This gives the effect of curtains or blinds.
The bottom of the window was then embellished with Holly leaves and Pine branch die cuts.
The pine cones were made from a rolled flower die in Kraft brown.
Some red Stickles for holly berries, and there you have section 1.


  This was made on a 4x4" Kraft card base.
We then used a LOTV Die cut topper. 
The topper was matted onto red card.
Then onto the Kraft brown base.
I then used a quickie Glue pen and some Glamour Dust to highlight the snowflakes.
Also the snow on the ground.


 The bottom of the Decoration.
Simply a 2x2" piece of Kraft brown card.
Using the same tartan like paper matted onto Red card.
A LOTV Christmas sentiment stamped onto Kraft card. 
Matted onto a red scalloped circle.


 To join them together I used red ribbon.
When the ribbon was in place I then stuck same sized kraft brown card over the back.
This is to cover the ends of the ribbon and also makes it a bit more secure.


Thanks for stopping by. 
I appreciate all comments you may have on my creations.

Gill

Thursday, 17 October 2013

A Hobby House Christmas


Good morning 

Today I would like to share with you a couple of cards I have made using the Hobby House Die Cut Toppers Sheet.


Once again I have used 6x6" card blanks. 
I tried to keep this simple with just using the blue snowflake papers.
But somehow this didin't look quite right, so I matted everything onto red card.
The topper looked a bit stark white so I dug out a snowflake stamp and used second generation images around the edge of the topper.
I layered the topper ontop of a circle doily for added interest.
Some red gems in each corner and red Ric Rak ribbon.
I also used a strip of the paper matted onto red again down the left hand side.


Again this is a 6x6" card blank base.
The background paper is from an Artoz Winter paper pad.
Just as in the card above, I have matted onto red card.
Added a Doily for interest.
Red gems in the corners and then also on the strip across the bottom.
Again second generation stamped snowflake on the topper sheet.


Another card using the same ideas as above.


And again, well I had the papers and red card out !
I was great how after the first card the rest all just seemed to come together very quickly.

Thanks for stopping by. 
I appreciate all comments you may have on my creations.

Gill

Tuesday, 15 October 2013

Lili of the Valley Day Out

Good morning

Today I would like to share with you a couple of items I made on a recent trip out to Lili of the Valley.
My wonderful friend and I went over to do an all day workshop with Dawny P from their design team.


This first project is a decorated paper bag. 
This is ideal for those Christmas presents which are just too awkward a shape to wrap up !
This is a great way to also use up those bits of paper you were keeping. 
You can die cut them to embellish the bag.


This next is an 8x8" card blank.
Now this isn't a size I normally make as I find them a bit big.
But again this was made using up, dare I say, left overs from other cards. 
The Topper from a Lili of the Valley die cut sheet. 
Then strips of paper off cuts with chevrons cut in the bottom.
A sentiment and some bling finish it off.

Thanks for stopping by. 
I appreciate all comments you may have on my creations.

Gill

Wednesday, 9 October 2013

Flip Flop Album

Good Morning

Today I would like to share with you a projectI have made using a Flip Flop album from Kaisercraft.


This is the book made up, Although I still need to find some photos to put in it.
The three holes are pre done in the top shape so enable you to thread ribbon or whatever through.


This is the front of the pages


And these are the back. 
All I need now is some photos to go with it :)

Thanks for stopping by. 
I appreciate all comments you may have on my creations.

Gill

Tuesday, 8 October 2013

Christmas Post

Good Morning

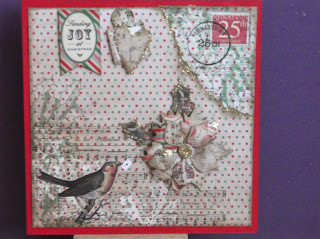
Tpday I would like to share with you a couple of cards made during last week workshop at The Stamp Pad. We were using the wonderful 'Chrsitmas Post' kit from CraftworkCards. Now I don't need any more Christmas papers, but want? Well that is another story :) These are gorgeous papers.


This first card was quite simple to make yet very effective.
A 6x6" card blank matted with a sheet of paper from the kit.
The baubles were die cut from the patterned paper and then stuck back to back to create a 3d effect.
 The tag was from the die cut sheet in the pack.
Then some Card Candi top left and bottom right .
Some ribbon and there you have it :)


Again the card was made using  6x6" card base.
This time we trimmed about 2cm off the right hand side.
Behind this we stuck a strip of patterned paper inside the card.
The it was simply two strips of the patterned paper. 
Cut into a 'V' at the botttom.
Then the die cuts were added and layered up.
I then used glamour dust to brighten up some of the pieces.


This last card was also a 6x6" card base.
We took a 5 3/4" square of the birdy patterned paper, and toen the top right hand corner off.
Beheind this we placed a square of paper with the stamp and postmark on.
The flower was made using the die cuts in the pack.
Then we added some more of the Die cuts from the pack.
Added glamour dust to give it sparkle and there you go.

Thanks for stopping by. 
I appreciate all comments you may have on my creations.

Gill

Sunday, 6 October 2013

A Christmas Mini Book

Good Morning

Today I would like to share with you a Mini book I made, (from scratch! )


This is the front of the mini book. 
The top and bottom flaps are held together with small magnets, to stop it opening when you don't want it to.
The papers are from the new Christmas Kaisercraft range.


This is the inside of the top flap.
It holds a message and a tag for you to write on or add a picture to.


This picture shows the bottom flap.
This has a pocket which hols a number of tags to write on or add decorations to.
The page has a thin lift up section so you can put a secret message, or a photo which you don't want everyone to see :)


When you open up the first page you have another tag in a pocket. 
Then you have space for a photo of a loved one.


Underneath that page in another which opens out to store two more photos.


Underneath this is space for two more photos or messages.


As we open the last page we reveal a pocket with two tags in. 
Either for more photos or messages.


Another pocket, and more tags.
On the left you can see the frame mat ready for putting a special photo in or special message.

Thanks for stopping by. 
I appreciate all comments you may have on my creations.

Gill

Saturday, 5 October 2013

More Autumn

Good Morning

Toady I would like to share with you another couple of Autumn inspired cards. After making the card for the Wild Orchid challenge I carried on and made another two :)


This first one uses one of the papers which had a gorgeous sunflower up the side of it.
I decided that I couldn't cover the design up so I used a portrait topper.
Mounted the topper onto Kraft brown card, inking all the edges.
Then I used some stardust Stickles on the sunflower and leaves.
I am really enjoying this colour combo at the moment.


For this second card I again kept it simple.
The paper was so gorgeous I didn't want to cover it up.
Again another Hobby House topper by Elisabeth Bell.
Backed onto Kraft brown card.
Glitter on the flowers and leaves and there you have it.

Thanks for stopping by. 
I appreciate all comments you may have on my creations.

Gill

Friday, 4 October 2013

Cute Christmas Cards

Good Morning

Today I want to share with you some Christmas cards which I started making on my Summer holidays!
Well what I mean we went to Wales for a week and I took some Craftwork Cards topper and my Promarkers with me. So when hubby and my boys were watching a film in the evenings I sat and coloured.


This first one was really easy to colour in. gold for the stars.
Some pale blue for the ice sheet.
Little bits of pale grey for the polar bear and pale pink for his ears and paws.
This was then quite simply matted and layered with foiled paper.


This second card was also coloured in the sun!
I decided to go quite bold and bright with this snowman. 
The snowballs have all been glittered with glamour dust.
Straightforward matting and layering with white card. 
The strip down the left hand side was made using the offcuts of the papers.
A circular sentiment, matted onto a scalloped circular blue paper.
Simple but effective, and great for the kids.

Thanks for stopping by. 
I appreciate all comments you may have on my creations.

Gill

Thursday, 3 October 2013

Classy Christmas

Good Morning

Well as promised, today I am going to show you the last card we made on the Christmas Card workshop last week at The Stamp Pad.

This one was probably the one I thought I was going to struggle the most with, if I am being honest. But it is the one I have fallen in love with the most.


For this card we stated off with a 7x5" card blank which we used landscape.
The postcard image was stamped onto white card.
We then colourd in the houses, trees, holly and berries with watercolour pencils.
We then added some blue where the snow was lying.
The image was then gently inked around the edges with distress inks.
This was matted onto some red patterned paper, which had had the edges distressed.
This was then matted at an angle onto some green patterned paper, again with the edges distressed.
On the corner, top right and bottom left was added some frantage and then gently heated from underneath, this is so the frantage powders didn't all fly away before they melted.
When sticking the green paper down, I didn't stick two of the corners and these have curled up. Which I quite like the effect of.
The card blank was also inked with the distress ink so it all tied together.


Thanks for stopping by. 
I appreciate all comments you may have on my creations.

Gill

Wednesday, 2 October 2013

Autumn Colours

Good Morning

Well the mojo is back and working !


This card was made using a 6x6" scalloped card base.
The paper is from a BoBunny paper pad called Forever Fall.
The image is from a die cut topper sheet by Hobby House.
I rounded the corners from the topper and then matted it onto Kraft card. 
The image, mat and papers were all inked round the edges with Distress Ink.
The flowers are from Wild Orchid,
Not sure if the bronze pearl sprays show up very well on the photo.
I love this image, she is so cute, and coloured better than I could!

I would like to enter this into the following challenges :-
Wild Orchid Challenge - Inspired by Autumn
Crafty Little Fairies - Autumn Colurs

Thanks for stopping by. 
I appreciate all comments you may have on my creations.

Gill

Tuesday, 1 October 2013

Awol Mojo

Good Morning

Sorry I have been sporadic in posting recently, I seem to have misplaced my crafy mojo :(

So to try any revive the said mojo, I have been to a Christmas Card workshop with the talented Gwen at The Stamp Pad in Saddleworth. Well I'm not sure what she did, but my mojo has come back :) Thank You.


For this first card, we used a 6x6" square card blank. The papers came from one sheet of double sided paper, great trick if you want your papers to match!
The stamp is from an InkadinkadooChristmas set.
This was stamped and then embossed with some frantage embossing powder.
This was on some card which had been die cut using Nesties Labels 4 (Still a great favourite)
The holly flourish in the top right hand corner is a Cherry Lynn Die, as we didn;t have the right colour card, we used white pearl card and then coloured it with Distress inks.
A few red gems for the Holly Berries, and you have a simple yet stunning card.


For the second card we used a new Stampendous Snowman and friends stamp.
He and his friends are divine! Loving colouring in at the moment.
The 'Merry Christmas' sentiment is from an Inkadinkadoo set.
Snowman was stamped and then coloured in,
To get teh arched top to the image, we placed a circle nestie on the image, but only cut half way.
Some blue glitter starry card on the top half of the card.
Then at the bottom we tore four strips of card to create the snow drifts.
The back two were stuck flat to the card, then we stuck snowman on.
Then the front two were stuck on with foam pads. We then glittered the top edges.

Call back later in the week for a look at the last card from this class. 

Thanks for stopping by. 
I appreciate all comments you may have on my creations.

Gill

Saturday, 14 September 2013

More Stamping

Good Morning

Today I would like to share with you another couple of cards which were made simply by stamping onto the card blank. When I say simply, not quite as you have to get the images the right way up :)


This first card was most definately NOT a simple card! 
First of all we die cut a circle from a scrap piece of card.
Then taped it to the card front, then inked through the circle.
Without moving the apeture, we then stamped through this with a script stamp. 
(Trying to make sure it is the right way up :)
Then a floral stamped image was stamped on the left hand side and a sentiment on the righthand side.


For this card we used an A6 tent fold card (folded at the top).
Using a pricking ruler and a pokey tool, we pricked a border around the card.
Then the floral stamp was stamped on both sides.
Then the solid stamp in the middle. 
A sentiment from Kaisercraft in the same ink, and there you have a simple card.


This is another A6 card, this time in Grey Pearl cardstock.
This time I used a Hot Off The Press border stamp in Silver ink.
A floral stamp in Teal ink.
A Kaisercraft sentiment in silver.
I thought this was too plain at first but it is growing on me :)

Thanks for stopping by. 
I appreciate all comments you may have on my creations.

Gill

Friday, 13 September 2013

White Christmas

Good Morning

Today I would like to share with you a couple of White Christmas cards. Now this was quite difficult for me as with Christmas I usually throw lots of  colour at it.


This is an A6 landscape card blank.
The white card was embossed with a cuttlebug Snowflake embossing folder to cover 3/4 of the card.
Then using my score board we wmbossed three straight lines (only two show up in the photo).
Then we wrapped some spotty organza ribbon around the card and knotted it.
The embossed card was matted onto Silver card.
This was them matted onto the card front.
A silver peel off greeting and there you have a simple yet stylish card.


This card was made using a 6x6" card blank in a mushroom colour.
The white pearl card was embossed using a bauble embossing folder.
This was then gently inked with Pumice Stone distress ink.
The Snowman was stamped in Pumice Stone onto the same pearl card stock.
The image was then die cut using nesties Labels 4 die.
This was also gently inked with Pumice Stone.
A fabby silky crush ribbon bow, and there you have it!
Sounds easy, and it was until I got to the bow! 

Thanks for stopping by. 
I appreciate all comments you may have on my creations.

Gill

Thursday, 12 September 2013

Cute Christmas

Good Morning

Today I would like to share with you anothe cate I have made for Christmas! I have used a gorgeous Hobby House die cut topper on this card.


For this card I have used a 6x6" Kraft brown card blank.
The die cut image was not the right shape for my card, so I die cut it with Nesties Lables 26.
Whilst the image was still in the die, I gently inked it.
I then die cut the pearlised blue card in the next size lables 26 die.
The background paper was one that I have had in my stash for a long time! The reason it was still sat there was becaused I didn't really like it. So I got out my distress ink in Stormy Sky and a swirly dotty stamp.
This on top of the paper really brough it to life.
The papers were layered up flat as shown.
Some larger red pearls in the corners of the card.
Some small red pearls in the corner of the image.
And I have a card I really liked from a piece of patterned paper I really didn't like!

I would like to enter this card into this weeks Cutie Pie Challenge


Thanks for stopping by. 
I appreciate all comments you may have on my creations.

Gill

Wednesday, 11 September 2013

Flat Cards

Good Morning

Today I would like to share with you a couple of cards I made during a workshop at The Stamp Pad in Saddleworth recently. We were looking at one layer or flat cards, you know the ones which don't cost a fortune to post these days! It was a really good back to basics workshop. It alkso reminded me of how many stamps I have and the fact I really need to get them out and play more!


This first card is a simple 5x5" card blank.
Along the bottom we stamped three solid circles in a pale yellow colour.
Then using small flower stamps, simply stamped these in black, one in each circle.
A stamped message and away you go.


This second card is an A6 white card blank.
This time we used a shabby recetangle solid stamp.
This was stamped three times in two colours, slightly overlapping.
A floral swirly border was stamped in a complementary colour.
A message and a few gems and another finished card!


Thanks for stopping by. 
I appreciate all comments you may have on my creations.

Gill

Tuesday, 10 September 2013

18th Card

Good Morning

Today I would like to share with you a card I made for my niece's 18th recently.
Although she is quite a girly girl, she can also hold her own with the boys! 18 is so grown up, yet underneath I still see her as my little niece to love and protect. I found this card very difficult to make as I wanted to make it grown up, but struggled :)


I used an 8x8" card blank.
The papers are from 'Perfect Pair' paper pad by Lily of the Vallley
The die cut image is Forever friends
Scalloped Ovals die cut with a nestie.
Gem swirls from Hobby House.

I would like to enter this card into this weeks Crafty Little Faries challenge.

Thanks for stopping by. 
I appreciate all comments you may have on my creations.

Gill

Saturday, 7 September 2013

Shhh the 'C' word!

Good morning

Today I would like to share with you some cards I have made in readiness for Christmas ! !


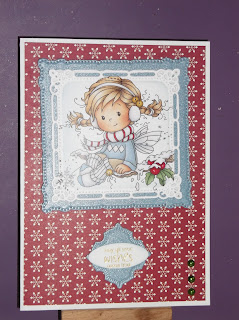
This first card is a 7x5" Kraft brown card blank.
The backing paper is a red paper with some script running across it.
The Hobby House image was die cut using an Oval Nestie in Pale Blue card.
I have then simply layered the red, blue and Kraft brown to make the strips which run up the lft hand side and across the bottom.
The message is from Craftwork Cards matted onto a scalloped pale blue.
A few pearls in the corners and the card in done! 
Fairly quick and easy.


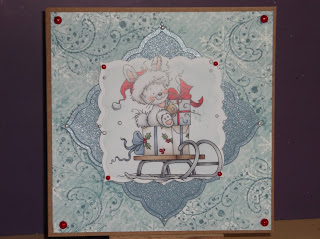
For this next card I again used a 7x5" card blank.
This time in white card.
Onto this I stuck some red paper which had snowflakes all over it.
The Image was then die cut using Nesties Marvelous Squares.
The background is also from the Marvelous squares, cut in pearlesent Blue.
The smallest die was used again with the pearl Blue and a sentiement attached.
A couple of green gems in the corner finish this card off.


Thanks for stopping by. 
I appreciate all comments you may have on my creations.

Gill

Friday, 6 September 2013

More Hobby House

Good morning

Today I would like to share with you another card made using the fabby Hobby House die cut sheets.

This card ws made using a Pink 6x6" card blank.
Some swirly organza ribbon arounf the spine of the card.
Some white peel offs in the corners.
The image was die cut in a circle and then matted onto a scalloped circle of the pink card.


As you can see from this next shot, as the card opens, the die cut swings in the apeture! 


Thanks for stopping by. 
I appreciate all comments you may have on my creations.

Gill

Thursday, 5 September 2013

Hobby House

Good Morning

Today I would like to share with you some cards made with my new obsession! Hobby House die cut sheets, and wonderful embellishments.

This first card is a 6x6" sqaure mint green card  blank.
The backing paper reads Happy Birthday and was mounted onto white card.
The image was a circular image which wsa matted onto white card and then die cut using the spellbinders hexagon die. As well as cutting the hexagon shape, this also made the diecut flater to the card.
Some peel off corners and a message finish this card off.


This second card is also featuring a Hobby House die cut.
Again it is using a 6x6" white card blank.
This is the same image only a different size.
This has been die cut using a scalloped circle die.
The backing paper is vellum, which has been attached using some fabby pearl brads to some mushroom coloured card, before sticking to the card.
Some spotty ribbon around the middle and another embelishment from the Hobby House.


Thanks for stopping by. 
I appreciate all comments you may have on my creations.

Gill

Wednesday, 4 September 2013

Catching Up

Good Morning

Really must catch up with myself. Having not blogged for what seems like ages I have lots of cards to show you.

This is another card made using the Craftwork Cards Time Flies Collection.
The fabby panel in the middle was made using a corner die!
I was a bit fiddly, but you get a square of paper/card and die cut opposite corners and then trim off the sections between them!
The rest was just die cut pieces matted and layered up.


Thanks for stopping by. 
I appreciate all comments you may have on my creations.

Gill

Tuesday, 3 September 2013

Long Time No See

Hello There

Sorry I have been Awol for a while. Things have been a bit hectic and I really need to get more organised.
Also my crafty mojo has been for a walkabout :)

My first card I want to show you was made on a workshop with the talented Gwen from The Stamp Pad in Greenfield.


This is a 6x6" card blank in white. 
All the papers on this card are from the Craftwork Cards 'Time Flies' Collection.
The purple circle in the middle is gorgeous purple velvet paper which has been embossed and then cut out using s scalloped circle spellbinder die.


This second card was made using a scalloped 6x6" card blank.
The papers are from Craftwork Cards Time Flies.
Not sure if this shows on the image, but the background card was a piece of white card embossed with a folder called Swiss Dots.

Thanks for stopping by. 
I appreciate all comments you may have on my creations.

Gill