Showing posts with label Distress inks. Show all posts

Wednesday, 17 February 2021

Baby Boy Christening

 Good morning

Today I would like to share with you a Christening card for a baby boy. 


For this card, I used the Creative Expressions Ornate Pierced Rectangles die for the card base.
I then used the next die down and the intricate die to cut the silver mirri card.
The image is from Lili of the Valley, and is called Baby Christening.
This was coloured with Spectrum Noir Alcohol markers.
I inked the edges with Salty Ocean Distress ink. 

#creativeexpressions
#liliofthevalley
#spectrumnoir


Thank you for stopping by. 
I appreciate any comments you have on my creations.

Gill x


Wednesday, 3 August 2016

More Art Journal pages

Good Morning

Today I would like to share with you another couple of pages from my Journal.


This page was gently inked with Squeezed Lemonade Distress Ink.
The quote was from my Pintrest boards.
I have used Moss Green DI for the leaves and branches,
I have also used a harlequin stencil with more yellow DI.
The stamps are from the Crafters Companion Textures stamp set.


This page was inked with Moss Green DI.
Then the quote printed off and adhered to the page with Mod Podge.
The stamps are again from Crafters Companion, Textures.
The mask was a 'Cracked Ice' one which I inked through with Blue.

Thanks for stopping by. 
I appreciate all comments you may have on my creations.

Gill

Monday, 1 August 2016

Floral Muse Mini Book

Good Morning

Today I would like to share with you a mini book made from the gorgeous Floral Muse papers from Trimcraft.


The book is made from 4" greyboard covers.
These were covered with the floral papers.
The Butterfly was covered with Glossy Accents and then had Glamour Dust sprinkled over the top.
The 'Life is Beautiful' sticker was put in the top corner.
With the wooden frame around it.
A small bow added to the bottom corner of the frame.


The pages were made by cutting the paper down to 3.5" by 7" long.
They were then folded upwards in half.
They were then cut on the diagonal.
The piece cut off was then trimmed down and used on another page.


On some pages I stamped butterfly's in Brown Distress ink.
Then coloured them in, in Victorian Velvet Distress.


On some pages I put a sticker from the set.

In all the pockets I put a Sizzix die cut tag.
The mini book was bound together with a Bind It All.


Thanks for stopping by. 
I appreciate all comments you may have on my creations.

Gill

Saturday, 30 July 2016

Pretty Posy Cards

Good morning

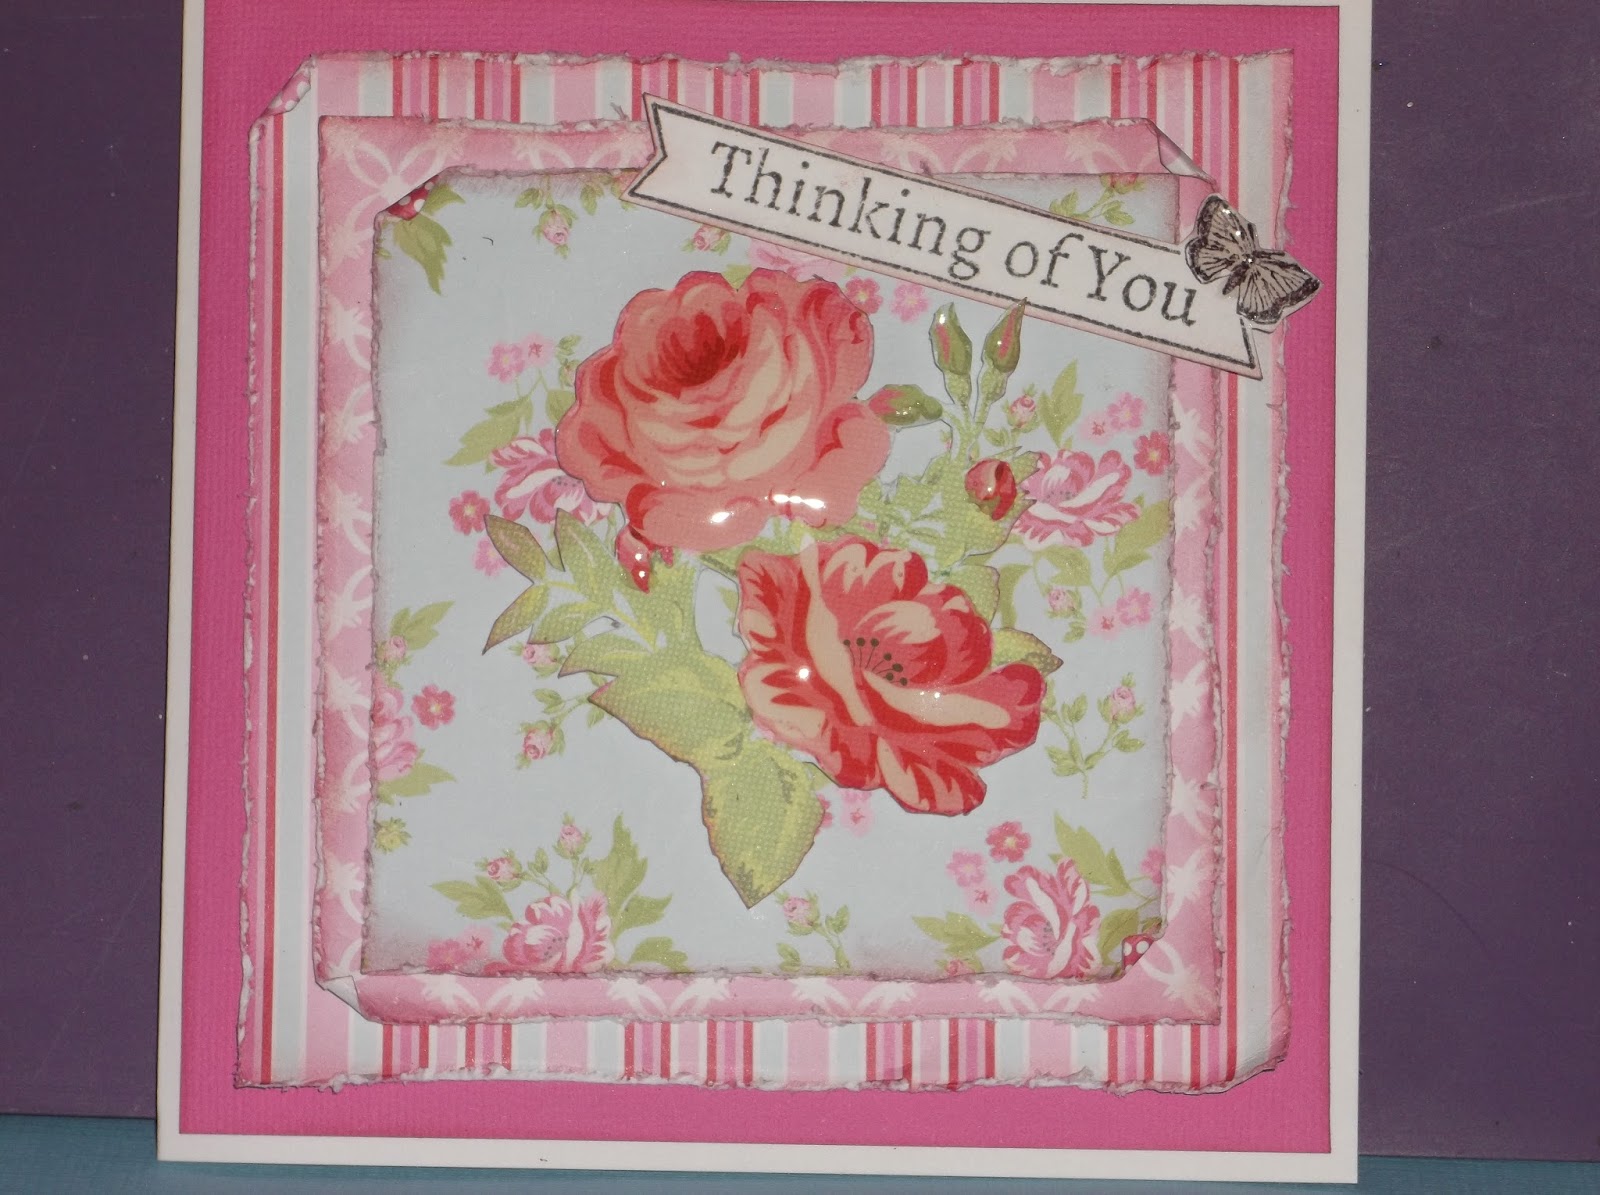
 Today I would like to share with you three cards I made using the First Edition Pretty Posy Papeer pad. I have made these using only the papers and no toppers!

All three cards have been made using 6x6" card bases.


For this first card I used the Pink lattice paper, as the background.
Then a section of the blue floral paper.
Then a small offcut of the white heart papers.
A small length of the stripy paper.
All these papers were layered onto pick cardstock.
Some pink organza ribbon was wrapped around the striped panel.
The stamp used was from the Floral Muse collection.
Three small gems in the top left and bottom right finish the card off.


For this second card I used a large square of the striped card.
Backed this onto pink card.
When I cut the blue floral papers I accidentally cut it too small.
So I divided into four squares onto the pink card.
I then wrapped the pink organza ribbon around this panel and tied a bow.
Small gems in each corner to finish.


For this last card I decided not to stay clean and simple.
So I cut a piece of pink cardstock slightly smaller than the card base.
I then cut a square of the stripy paper.
A square of the pink lattice paper.
Then a square of the blue floral paper.
On each of these I inked the edges using Frayed Burlap Distress Ink.
All these edges were then distressed using a distress tool 
(you can also used your scissors to get the same effect).
I fussy cut the large roses from the papers, and then highlighted them with Glossy Accents.
This was then raised up from the card with foam pads.
The sentiment was stamped in Frayed Burlap with the butterfly coloured in Victorian Velvet.
(This stamp is from the Floral Muse collection.)

Thanks for stopping by. 
I appreciate all comments you may have on my creations.

Gill

Tuesday, 26 July 2016

Floral Muse cards

Good Morning

Today I would like to share with you a couple of cards made using Trimcraft's Floral Muse papers.
I challenged myself to use the kit, without using anything else from my stash. No Toppers, HELP!


All the cards were made using 6x6" card bases.
This first card was made using the floral paper.
Onto this I used the 'distressed' stamp, with Vintage Photo Ink.
The Butterflys were stamped onto white card with Vintage photo,
I then coloured them with Victorian Velvet ink.
The Birthday Wishes was stamped onto white card with Vintage Photo.
The wooden frame came with the kit. as did the flowers.


For this second card used the green spot paper, backed onto brown card.
A strip of the peach coloured script paper, again backed onto brown. 
Then I chose the section of paper with the butterfly on, 
Also backed onto brown card.
These were layered up and then the accordian fold heart added.
Three small gems added to the bottom left and then one in each corner of the butterfly panel.


For this card all the layers were backed onto brown card.
I used the peach script paper for the background.
Green spot paper for the vertical border.
Another section of the butterfly paper.
I used the lattice embossing folder which came with the kit to emboss some white card.
I then inked this with Vintage photo distress ink.
The sentiment stamp also came with the kit.
Some small gems in the corners complete this card.

Thanks for stopping by. 
I appreciate all comments you may have on my creations.

Gill

Sunday, 24 July 2016

A Birthday Card

Good Morning

Today I would like to share with you a card made for a very good friend of mine.


This card is so far removed from my normal style, but I really enjoyed the process of making it.
The papers are from Marion Smith.
Th card is a 6x6" car base.
The papers were cut at 5.5", 5" and 4.5". 
Out of the middle blue layer I cut the mat for the topper.
All the layers were inked with Victorian Velvet distress ink.
The topper is a Lili of the Valley Image.
They were then distressed using a distressing tool, (however this can be done with scissors).
The border strip is the same paper as the largest layer. 
I wrapped this with pale pink ribbon, 
Over this wrapped some scalloped lace.
The sentiment was printed on the PC.
A Hobby House angel dangling from a white ribbon bow.
Three pink pearls were added in the top right and bottom left hand corner of the topper.


I would like to enter this card into the Craft Barn 'C' challenge. (shabby Chic).
Also for the Crafty Sentiments Anything Goes challenge.

Thanks for stopping by. 
I appreciate all comments you may have on my creations.

Gill

Sunday, 3 July 2016

A couple of Journal pages

Good Morning

Today I would like to share with you a couple of Art Journal pages with you.
My book is an 8x8" white scrapbook from Hobbycraft (these had been reduced to £5!)


This is my first page. 
The mask is a Prima mask. It differs from most of my masks as the majority of detail is around the edge, rather than in the middle.
I inked with Victorian Velvet Distress Ink.
I then Inked the branch at the top with Moss Green Distress Ink.
The colours in the middle with the quote on, was printed onto tissue paper and then stuck to the page using Mod Podge matte.
I then stamped the words with Victorian Velvet.


On page 2, I again inked with green through the branch stencil.
Then I used a Purple Distress Ink on the flourish in the bottom left hand corner.
Another quote printed on tissue and attached with Mod Podge.
Various word stamps were then stamped in different colours.


On Page 3, I used more stencils.
I used the same flourish as the previus page, in the opposite corner this time.
Another quote Mod Podge-ed to the page.

I started this journal when I realised that I have a lot of inspirational quotes saved on my Pintrest Boards, but they can't inspire me from there :)
My plan is to, eventually, have them all printed off and put in this journal. Then whenever I am having 'One of those days' I can pick it up and remind myself that life is not so bad.

I appreciate all comments you may have on my creations.

Gill

Tuesday, 4 August 2015

Stepper Card

Good morning

Today I would like to share with you a stepper card I have made. I have made a number of attempts at this type of card before, but never sucessfully managed it. That is until my friend Gwen at The Stamp Pad started selling this amazing die from Presscut. A quick whizz through my eBosser and all the cutting, measuring and scoring is done for you. A-May-Zing. I love it!


This was White A4 card which I cut with the die.
The backing paper is a blue check from my stash.
This was cut with the extra dies which come with the set.
No measuring needed! :)
The topper is from a Lili of the Valley Art Pad.
The sentiment is also from Lili of the Valley.
All were inked around the edges with Distress ink.
The flourish on either side was cut with a memory box die, from green bazzill.
The corner flourish was cut from a die which was free with a magazine!
The three flowers are from Prima.


Thanks for stopping by. 
I appreciate all comments you may have on my creations.

Gill

Sunday, 2 August 2015

Another Sentiment Card

Good morning

Today I woud like to share with you another card with just a sentiment on it. This came about by playing with off cuts of paper, which had been used on other cards! 


Again this is a 6x6" card base.
The papers are from Lili of the Valley.
The sentiment is also from Lili of the Valley.
Theis was stamped with Purple Distress Ink.
Die cut using a Marianne Die.
The edges of the papers were distressed with a pair of scissors, 
then inked with the distress ink.
I then used silver nailheads in the corners.

Thanks for stopping by. 
I appreciate all comments you may have on my creations.

Gill

Thursday, 30 July 2015

No Focal Image


Good morning 

Today I would like to share with you a card I have made which uses NO focal image. By that I mean, no Topper or picture.

This is so far away from my normal comfort zone. I have looked back over the cards I have made over the last few years and think this may be the first!


The card is made using a 6x6" card blank.
The papers are from Lili of the Valley, Timeless Victorian.
The sentiment is also Lili of the Valley.
The die cut is from a Marianne Die.
The flowers are from Prima.
The large Flourish is a Memory Box Die.
The corner was a free die from a magazine (forgotton which).
The papers were edged with Milled lavender distress ink, as was the die.


Thanks for stopping by. 
I appreciate all comments you may have on my creations.

Gill

Monday, 27 July 2015

MDF


Hello There

Recently I went to the Great British Craft Festival with two friends. While there we decided to do a free 'Make and Take' with the MDF Man.
This is the picture frame we made.


We used a 6" square MDF with a heart appature.
The frame and backing were painted with a Mushroom paint.
The papers were from House of Zandra.
The butterflys were cut from the same paper and moulded before sticking on.
The flourish was done using gathered twigs Distress Ink though a stencil.
Then I added a few clear gems on the flowers.

This was a fairly quick  and cute project. I didn't glue mine all the way round, so  I can slide a photo in at a later point in time.

Thanks for stopping by. 
I appreciate all comments you may have on my creations.

Gill

Tuesday, 26 August 2014

Cutie Pie Challenge

Hi there

Today I would like to share with you a card I have made for this weeks Cutie Pie Challenge. This weeks theme is Buttons and Bows. As with my recent makes, this is again using a Hobby House Topper. I am really enjoying the process of making up cards with these at the moment as I haven't got the time to be stamping and colouring in.


This is a 6x6" card blank.
Everything is matted onto Kraft brown cardstock.
The background papers is actually Hobby House card in Snowflake Flurry and Check.
Around the topper I have stamped a snowflake stamp in Festive Berries Distress Ink.
I think this just takes away the starkness of the white topper.
I have added a red organza bow.
There are three small red buttons in the bottom right hand corner,
 and one large red button in the top left hand corner.

I would like to enter this into this weeks Cutie Pie Challenge.


Thanks for stopping by. 
I appreciate all comments you may have on my creations.

Gill

Wednesday, 5 March 2014

Hi There

Well That was some break from blogging!

I had lots of things going on in life and decided to take a break from blogging for a week or so ! ! ! OK it was a little longer than that :)

Hopefully things are on the up now, and I should have more time to craft and even blog!

So to get me back into the crafting frame of mind I went 'back to basics'. Using some of those toppers  which I'm sure we all have sitting there feeling unloved. This one is one which I had stamped out and coloured in but then it sat in a pile waiting to be made into a card.


The image is from Lili of the Valley
 The image has been coloured in with Promarkers.
It was die cut using Nesties Labels 2, then gently inked with Fired Brick distress Ink, whilst still in the die.
The papers come from the LOTV Candles and Cake Paper Pad.
The buttons in the top right and bottom left corners are, I think from Papermania, with Spots on them.
I hope this card has enough spots on it :)

I would like to enter this card into the following challenges :-
Crafty Sentiments - Spots or Dots
 Crafty Little Fairies - Shopping (for a present)

Thanks for stopping by. 
I appreciate all comments you may have on my creations.

Gill


Tuesday, 1 October 2013

Awol Mojo

Good Morning

Sorry I have been sporadic in posting recently, I seem to have misplaced my crafy mojo :(

So to try any revive the said mojo, I have been to a Christmas Card workshop with the talented Gwen at The Stamp Pad in Saddleworth. Well I'm not sure what she did, but my mojo has come back :) Thank You.


For this first card, we used a 6x6" square card blank. The papers came from one sheet of double sided paper, great trick if you want your papers to match!
The stamp is from an InkadinkadooChristmas set.
This was stamped and then embossed with some frantage embossing powder.
This was on some card which had been die cut using Nesties Labels 4 (Still a great favourite)
The holly flourish in the top right hand corner is a Cherry Lynn Die, as we didn;t have the right colour card, we used white pearl card and then coloured it with Distress inks.
A few red gems for the Holly Berries, and you have a simple yet stunning card.


For the second card we used a new Stampendous Snowman and friends stamp.
He and his friends are divine! Loving colouring in at the moment.
The 'Merry Christmas' sentiment is from an Inkadinkadoo set.
Snowman was stamped and then coloured in,
To get teh arched top to the image, we placed a circle nestie on the image, but only cut half way.
Some blue glitter starry card on the top half of the card.
Then at the bottom we tore four strips of card to create the snow drifts.
The back two were stuck flat to the card, then we stuck snowman on.
Then the front two were stuck on with foam pads. We then glittered the top edges.

Call back later in the week for a look at the last card from this class. 

Thanks for stopping by. 
I appreciate all comments you may have on my creations.

Gill

Friday, 13 September 2013

White Christmas

Good Morning

Today I would like to share with you a couple of White Christmas cards. Now this was quite difficult for me as with Christmas I usually throw lots of  colour at it.


This is an A6 landscape card blank.
The white card was embossed with a cuttlebug Snowflake embossing folder to cover 3/4 of the card.
Then using my score board we wmbossed three straight lines (only two show up in the photo).
Then we wrapped some spotty organza ribbon around the card and knotted it.
The embossed card was matted onto Silver card.
This was them matted onto the card front.
A silver peel off greeting and there you have a simple yet stylish card.


This card was made using a 6x6" card blank in a mushroom colour.
The white pearl card was embossed using a bauble embossing folder.
This was then gently inked with Pumice Stone distress ink.
The Snowman was stamped in Pumice Stone onto the same pearl card stock.
The image was then die cut using nesties Labels 4 die.
This was also gently inked with Pumice Stone.
A fabby silky crush ribbon bow, and there you have it!
Sounds easy, and it was until I got to the bow! 

Thanks for stopping by. 
I appreciate all comments you may have on my creations.

Gill
Thursday, 12 September 2013

Cute Christmas

Good Morning

Today I would like to share with you anothe cate I have made for Christmas! I have used a gorgeous Hobby House die cut topper on this card.


For this card I have used a 6x6" Kraft brown card blank.
The die cut image was not the right shape for my card, so I die cut it with Nesties Lables 26.
Whilst the image was still in the die, I gently inked it.
I then die cut the pearlised blue card in the next size lables 26 die.
The background paper was one that I have had in my stash for a long time! The reason it was still sat there was becaused I didn't really like it. So I got out my distress ink in Stormy Sky and a swirly dotty stamp.
This on top of the paper really brough it to life.
The papers were layered up flat as shown.
Some larger red pearls in the corners of the card.
Some small red pearls in the corner of the image.
And I have a card I really liked from a piece of patterned paper I really didn't like!

I would like to enter this card into this weeks Cutie Pie Challenge


Thanks for stopping by. 
I appreciate all comments you may have on my creations.

Gill

Tuesday, 25 June 2013

A card for Mum

Good Morning 

I don't know about you, but with all the cards recently for Dad's for Fathers day I have decided to show a card for Mum's, Just because I can and I don't think I could function with out having my mum at the end of the phone :)


 This is a 7x5" card blank.
The image is from Lili of the Valley - Teddy for Mum.
Coloured in with Promarkers.
The backing paper is from the First Edition Pad - Love Letters.
The image was then die cut using a Marianne die, 
Inked throught the die with Victoria Velvet Distress Ink.

Quite a simple and straightforward card to make, but I love it :)

Thanks for stopping by. 
I appreciate all comments you may have on my creations.

Gill


Thursday, 20 June 2013

Lili's Little Faires

 Good Morning

Today I would like to share with you a card made for the latest challenge over at Lili's Little Fairies. I love this challenge as it gives me chance to play with my (Few!) Lili of the Valley stamps.


This card is a 7x5" card blank used landscape.
The stamp is Bumble Bee Fairy.
The was stamped and coloured with Promarkers.
Then Die cut using nesties Labels 30.
Whilst still in the die, I inked with Rusty Hinge Distress.
The paper for this card is from a First Edition Paper Pad.

Thanks for stopping by. 
I appreciate all comments you may have on my creations.

Gill

Sunday, 28 April 2013

Hello

Hi There

Wow where did that week go???

Todays card which I am going to share with you is a Lili of the Valley one.


This is a 6x6" card blank.
Both the papers are from First Edition Boho Chic.
The Image is Fairy and Bumble Bee from Lili of the Valley.
Coloured with Promarkers.
Inked through the die with Distress Inks.
Die cut with Nesties Labels 26.
Flowers and leaves from Wild Orchid Crafts.

I would like to enter this card into this weeks Lili of the Valley Challenge.
Also this weeks The Cutie Pie Challenge.


Thanks for stopping by. 
I appreciate all comments you may have on my creations.

Gill

Monday, 22 April 2013

John Glossop

Good Morning

Over the weekend I was lucky enough to go on a workshop run by the talented John Glossop at the Stamp Pad. On this workshop we made a book type box. Or a Box type book depending on how you prefer it.

This first photo shows the front of the box/book. 
The whole project was made from 2mm Greyboard which had been scored through so that it would crease to form the corners.

We also cut some greyboard to form the frame and two end panels.

The greyboard was put through an embossing folder and tehn painted first with white paint and then with some runny blue paint to highlight the embossing.
 The rest of the greyboard was also painted with white paint and then had a wash of blue paint over the top.
The piece of greyboard in the middle was painted white, the lady stamped on it. 
Then we, very carefully painted the outside with gold paint. 
When this was dry we triple embossed it with clear powder to gice the shine.


Inside the 'book' we used different stamps and colours of distredd inks to create a  'collage' effect.
This is a great technique as it doesn't matter if your stamping isn't perfect.


The two insides of the 'side' pieces were covered with torn pieces of printed tissue and attached with melted beeswax, the beeswax also gives a different finish.

On the back inside page we used the Bind-It-All to make a notebook.


This is a better picture of the 'collage' stamping.

Thanks for stopping by. 
I appreciate all comments you may have on my creations.

Gill