Wednesday 29 June 2011

Lili of The Valley

Sorry for no posting for a couple of days.
Went to the hospital for a 'routine' procedure pn tuesday morning, expecting to be home for lunchtime !
Apparently I am NOT routine :) So came home today, Wednesday afternoon. Soooo tired after no sleep went straight to bed for a couple of hours. Feeling better now and have done a little crafting.
This card is my entry for the challenge over on the Lili of the Valley blog.
This is the original sketch
image
The card is a 6x6" scalloped card. The papers are BoBunny Anna Sophia and , I think, a Prima paper. Green gingham ribbon and a Lili of the Valley Dies cut. The has been cut with my Scalloped circle GoKreate dies using my Grand Calibur. The edges have been inked with green distress inks.

Off for some more sleep now.
Take care


Monday 27 June 2011

Cards. How much to charge?

Hi

I have been blog hopping recently and found a couple of blogs where the owners sell their cards. Now I don't know about you, but I always find it difficult to say how much I want for a card. I don't want to be too expensive in case they never want another card from me, then again I don't want to be so cheap that it ends up costing me to make the card.
Anyway I have come across this blog, with prices for cards that to me seem extortionate. I know how much time and effort goes into some cards but I still feel this is just WAY too much.
This is the blog I am talking about.

I was just wondering what everyone else feels about this. I would appreciate your comments even just to set my mind at rest that I am not undercharging.

Thanks

Sunday 26 June 2011

Fizzy Moon! !

Hi There

I have been playing with my Fizzy Moon goodies.

This first card is a Craftwork Cards card blank. The bracket edge was folded back on this and then background paper stuck on the front and the inside of the card. A circle cut out of Bazzill bling and then a scalloped circle of white cardstock. Both of these were inked around the edge and die cut using Nesties! Then a Fizzy Moon cardstock sticker was stuck on the circles. These were then attached to the card with foam pads. Four Craftwork Cards Card Candi in white were then stuck on after being inked to match the card!
This next card was really quick to make. I took a sheet of the 8x8" paper that had a design in  the bottom right hand corner. Trimmed to size for a 7x5" card, matted and layered onto coordinated bazzill cardstock. Stuck a Lets Party cardstock sticker onto the same blue card and then cut out and stuck on with foam pads. I then added the cardstock present sticker and glittery stars. Great when your kids want a card for a friend in 10 mins time !

Happy Crafting

Saturday 25 June 2011

SWALK

Hi there

Today I have been playing with my SWALK stamps and my nesties! No surprise there!
This card is a 6x6" scalloped edge card. The backing paper is from a paper pack in the Fizzy Moon range. I Love this range! The stamp is 'Best Friends' coloured with promarkers. Die cut with Nesties Labels 5, pale lilac cardstock, again cut with Nesties Labels 5. Two strips of purple cardstock layered onto the card and then a flower covering the join. A little bit of bling top right and bottom left.
Again this is the 'Best Friends' stamp, coloured with promarkers. This time die cut with Nesties Eyelet Circle.
For a change I cut my background paper and matted onto purple cardstock, but put it on in a geometric pattern. I find this is a great way of using up the pieces of paper left over when you cut an 8x8 sheet up. The image was stuck on with foam pads and the obligatory bling in two of the corners!
Forgot to say the paper is glittered as well ! ! I also just edged the cardstock on this one lightly with Milled Lavender Distress inks.

Happy Crafting

Friday 24 June 2011

Another Card!

Good morning

Just a quick post today. This is a card I made recently.
The card is an A5 landscape card in pearlescent cream, matted with navy card. The top paper is Anna Griffin the bottom paper is BoBunny double dot. A Martha Stewart border punch along the bottom, some cream lace coving the join in the papers. Some stunning blue ric rak ribbon at the top of the lace. The stamp is a Clarity stamp on pearl cream card die cut with Nesties label 1 and again matted on blue card. The scentiment was stamped on the same cream card and matted onto blue.
All these goodies, and more, available from The Stamp Pad in Saddleworth.

Happy Crafting

Wednesday 22 June 2011

Playing / Gilding

Hi there

I have not made any cards or scrapbookpages for a few days, but i have been playing. Over the weekend I decided to get out my Gilding Flakes and have a play.
These are some gears and cogs which I cut on my Big Shot with the Tim Holtz Die. The top ones were cut with grungepaper and I am going to try and emboss these later before inking and generally distressing them. The bottom ones I cut from greyboard ( the sort that comes on the back of notepads or packaging). I started off by cutting the board to slightly bigger than the piece I wanted to cut, then I used double sided sticky and stuck this on one side to the board. Then I ran this through the Big Shot. When I had taken all the excess pieces off I removed the other side of the sticky and applied my gilding flakes, I used a mixture pot of flakes.
At some point I will put these onto a card!

These toppers were made with a double sided peel off. The butterfly on the right is the peel of stuck to white card and then guilded, when cut out will be put onto a card. The one on the left was the waste from the peel off! I had cut around the image I was going to use whilst it was still on the peel off sheet. I then stuck the waste onto white card again. I removed the protective backing paper and guilded the image. When this has been cut out and stuck onto a card, you will have had 2 images for the price of one!

White card, Giliding Flakes and double sided peel offs and sticky sheels all from The Stamp Pad

Happy Crafting

Tuesday 21 June 2011

Difficult Looking card!

Hi There

Todays card is one which, when I first looked at it, thought it may take me a few weeks to do! ! However once you have mastered the masking technique it does become easier. I won't say really easy because then I will make a hugh mess of the next one!
This is the one I first did on a workshop at The Stamp Pad with the amazingly talented Gwen.
The first thing we did was to stamp the central postage stamp image (which was a Clarity Stamp), then mask this off and stamp other postage stamped images masking each one off as it had been done to prevent overlapping stamping. The we reversed the maske in that we cut out the central image so that we could stamp through the mask so it came out inside the postage stamp. then we inked the card with distress inks. Matted and layered paper and black cardstock and used a fabby inverted corner punch. A wrap of ribbon and the mounted onto mushroom grey pearly cardstock folded to give an A5 card.
Once I got into the stamping and masking I found it really thereputic and really enjoyed myself, UNTIL it came to putting the finishing black squares on! They are just 2mm square and come as a full sheet, of peel offs. This was fiddly and seemed to take forever. I just could not get them straight, difficult to hold even with tweezers, one craft thing I have decided I can live without.
Great card and so easily be altered for male or female,  young or old. Just tailor the images in the picture to the persons favourite hobby or pastime.

Happy Crafting

Monday 20 June 2011

Wedding Order

Hi There

I have not been crafting much this weekend as I felt a little under the weather. So I have decided to show some cards I made for an order I received for a 30th Wedding Anniversay. All 3 cards were for the same couple, so all had to be different!

The first one was a 7x5" card. Forever friends decoupage matted on pearl pink and pearl white card, die cut with nesties Labels 1. The sentiment was printed onto white pearl card and then cut out using the scalloped rectangles. Some organza ribbon and pearl stones finish it off.

This was an 8x8" card the pink paper was inked with distress inks. Again a Forever Friends decoupage and pink nesties labels one die cut. The pearlised paper was edged with Martha Stewart eyelet lace around the page punch. Printing done on computer and then die cut with rectangle nesties. Adhesive pearls in the corners and on the main image.

This card was an A4 sized card. Peach pearl card made up the front  with pearlised paper edged with the MStewart around the page punch. Die cut decoupage matted onto peach pearl card flowers layered up in bottom corner and trimmed with adhesive pearls top left and bottom right.

This just shows that although the die cut decoupage are very cute, they can be used on larger than normal cards. I was a little worried at first when I looked at the size of the topper and the size of the card, but as long as you plan a little bit more than normal, they can look really nice.

Happy crafting.

Saturday 18 June 2011

Maternity Card

Hi there

Well today I would like to share a card I made for a friend who was leaving work to go on Maternity leave.
This is a 7x5" card, matted onto peachy coloured glitter card and white pearl card. The stamped image was stamped onto super smooth white card and coloured with propmarkers. Some spotty Bobunny ribbon at the bottom of the pearly card and then some deep pink organza ribbon on the glitter card. Finished with 4 raspberry pink candy dots from Pebbles Inc.
A simple but effective card, quick to make as she had to finish earlier than expected so only had a days notice to get it done !
As you can probably guess, she knew she was having a little girl.

Happy Crafting

Friday 17 June 2011

Decoupage and Brass Stencils

Hi There

Following on from yesterdays post I am going to show some more decoupage cards. The first two were made with the backing papers which came with the decoupage sheets. Sheets and stencils came from The Stamp Pad, during a demo day.


However I have more toppers than the backing papers so I have used a brass stencil (you know thiose things which most of us have but don't use anymore because they are a faff and they sit gathering dust!). I Put my brass stencil and card through my Grand Calibur and it embosses amazingly well, with so little effort! ! Will definately be routing out the rest of them!
The embossed cardstock was then inked with Weathered wood  and Spun Sugar Distress inks. The topper was then placed in the centre of the unembossed bit. Although a nice card I felt that it lacked something,  I tried bling that wasn't right so I sprayed it with some Crafters Companion Iridescent spray and sparkle. Not sure if it shows up well on here but it just gives it a slight twinkle but not too much. 

Hope this has inspired you to dust off some crafting stash which you have had for a while, and look at it in a new light!

Happy Crafting.

Thursday 16 June 2011

Blog Giveaway

Hi There

I have just come across this blog which is giving away Blog Candy. To be in with a chance of winning all you have to do is to click on the link http://thealteredegoblog.blogspot.co...r-to-blog.html and become a follower.
How hard is that :)

Decoupage cards!

Hi there

A while ago some of you would have been in shock had I done some decoupage cards! I always found them quite fiddly and tiresome to have to cut them out :)
However, whilst I was laid up after my operation, and not being able to lift anything heavier than a brew! I sat and cut out a number of flower decoupage sheets and kept them all seperated in the coin bags you get from the Post Office.  When I felt a bit better, I used my bone folder to shape them and then used silicone glue to stick them together.
Well today I can show you some that I have now made up into cards! Does 7 weeks from start to finish making a card set any kind of record??

This is the decoupage on the flower sheet it came with, matted onto Mirri and then coral coloured card. All on a white 7x5" card.

This is another version matted onto mirri card and then Coral card, leaving a slightly larger border at the bottom an add some gems. Then a narrow strip of mirri card down the left hand side sets it off well.

This is slightly different version with a different butterfly. When I cut the mat on this I must have had a 'moment' as as you can see the mirri mat is nowhere near big enough! Don't know who measured that one.
So I decided to put it off set behind the main image and then mat onto the coral card and add some bling.

The decoupage sheets were bought from The Stamp Pad during a demo day. They were half price and as I knew I would be laid up, thought I would give them a go!

Hope this gives you some ideas, remember, there are no mistakes in crafting, only happy accidents! 

Happy Crafting 

Wednesday 15 June 2011

Waltzing Mouse 51

Hi There

This is my entry for the Waltzing Mouse sketch #51.This is the original sketch which I worked from.
WMSC51
This is my take on the sketch. I used some pink Blonde Moments paper, Green BoBunny paper. The Blooming Wondeful stamp from SWALK, die cut with nesties labels 4. Coloured with promarkers and inked with Tattred Rose distress inks. A round sentiment which had been stamped and inked (not sure which manufacturer it is from I received a bag of these as a gift ;) ) A pink pink spotty ribbon bow and two buttons finish it off.

Hope you enjoy my version of the sketch. I love to read your comments.

Happy Crafting

Tuesday 14 June 2011

Fathers Day

Hi there

Well as you know Fathers Day is fast approaching. These are some cards I made with men in mind.

The first one was a plain card matted and layered, then we used nesties Labels 1which was then inked using distress inks, pumice and broken china. The topper was made using double sided sticky, backed on card, die cut again with a nestie and then covered with gilding flakes.
The second was a card using map paper a plain tag added which was again distressed. A peel off (yes we all have lots of those!) stuck onto brown card and cut out to give a great effect when stuck on with foam tags. A little bit of embellishment and a simple yet effective card. 
This last one if my favourite. A card blank this tme using a medallion stamp to create the background. Ink it up, stamp once onto scrap paper and then stamp off the edge of the card. This gives a very random look but very effective and a great way of using stamps we all have perhaps gathering dust! The tissue paper was scrunched up before being glued to mirri card to give the aged look. The banners cut with Nesties and peel offs used to spell the word Dad. but you could put what ever you wish in these.


Thanks to Gwen at the Stamp Pad in Greenfield for a fantastic workshop. You know how much we all struggle with men!

Happy Crafting

Monday 13 June 2011

Mojo Monday 195

Hi There

This is a card I have designed using the Mojo Monday sketch.


I used a 7x5 card blank. The green paper is BoBunny Shabby Princess as is pink paper. The green strip across the middle was edged off with Martha Stewart Eyelet Lace border punch. The pink dots are Pebbles Inc Candy Dots in raspberry. The die cut shape is made using the nestabilites eylet circles, inked with victorian velvet distress inks and the green was snother distress ink. All these things can be bought from The Stamp Pad.  The stamped image is a SWALK stamp called 'Best Friends'. Finished off with some pink and brown spotty ribbon.

Happy Crafting

Sunday 12 June 2011

Canvas

Hi there
I would like to show you a canvas I made at a workshop yesterday, with the amazing Kay Halliwell-Sutton. The workshop was at the Stamp Pad in Saddleworth. We were using Kay's brand new stamps. All designed and made here in England!
My only problem with them, is that I love them all, and therefore want them all, and I can't have them all yet :(

We primed the MDF board with 3 colours of Acrylic paint, and also the mini canvas's. Then we stamped, inked, embossed and played all afternoon to produce these wonderful projects.
Even though some of use started with the same colours every project was different and individual.
Can't wait for Kay's Next visit!

Saturday 11 June 2011

Card Candy

Hi there

How many people out there have bought the Craftwork Cards, Card Candy? ? ? Does anyone else find that as fast as you use it, more appears in your stash??? I love this product and have it in farr too many colours. So as well as using in the traditional way, I have been looking at different ways to put it on my cards, and possibly scrapbook pages.

As my supply seems never ending I have been playing. My inspiration for these came from a feature in a magazine, sorry I don't recall which magazine, or even how long ago.
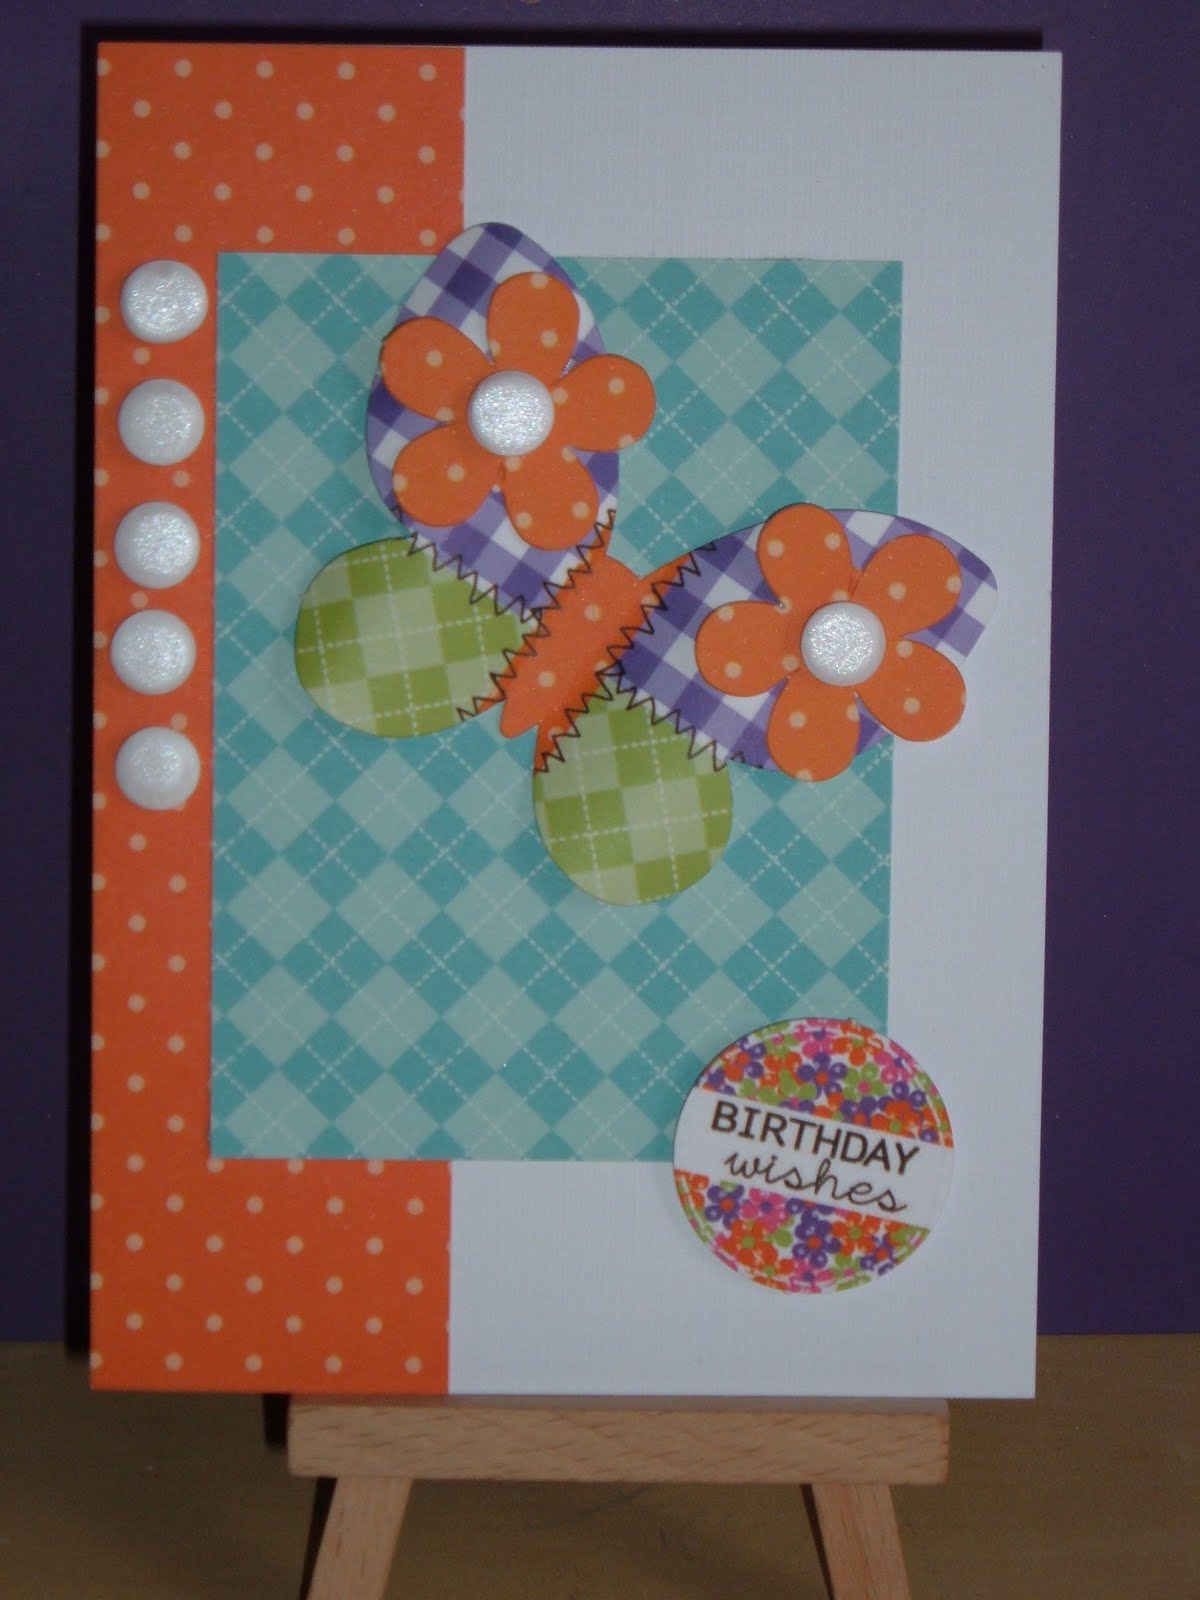
I have turned my card candy into flowers.

First of all I punched a circle of white card, I used a 1 1/2" circle as this was all I had to hand. Then I used a tacky glue, I used a one from Crafty Notions, and put a 10p size circle of glue down. Then, using tweezers, I put a candy upside down in the glue. Then I arranged more candy around it just tucking the candy under the centre one and into the glue. I then carried on all the way around. You can either leave them quite spread out or stand then more upright.
This is how it will look with one layer of 'petals'.

This is how it will look with two layers of 'petals'.

You can then play until you get you chosen effect. Try using just one colour for a very dramatic flower.
Or use different colours to pull your card or project together. 
I found my reverse tweezers from EKSuccess to be invaluable doing these.
I hope this has inspired you to use you card candy in more ways now. One this I will say is that it doesn't work with the metallic candy as they are white underneath :(

Happy Crafting

Friday 10 June 2011

Craftwork Cards

Hello

These are some more of the Craftwork Cards which have been made using their Fruit Scoop Collection.
This card was made using a Craftwork Cards Template. I simply drew the petals onto the paper, cut out and arranged onto the card. Simple but effective.

I love the funky coloured dog on this card.

The flowers were taken from the die-cut sheet and the petals shaped. The centres of the flowers were made using the white Card Candi. The flower stems were made from thin strips of the paper from the pack.

Love the elephant on this card.

All the goodies used on these cards can be bought from The Stamp Pad, Greenfield.

Thursday 9 June 2011

Birthday Card

Hello

I have decided to blog a birthday card which I made a few weeks ago for a special birthday.

I used an 8x8" square card. The pink paper was from a pack by Blonde Moments. The Nestie used was Labels 10 inked with Victorian Velvet distress Ink. The leaves were cut from green bazzill cardstock using a Marianne die. The cream Prima flower and the Petaloo flowers were inked with Victorian Velvet and then sprayed with Pink Lustre and Fireburst Violet Crafty Notions Colour sprays.
The name and words were cut out on my CraftRobo/Silhouette to enable me to co-ordinate the colours.

Happy Crafting

Wednesday 8 June 2011

Mojo Monday 194

Hi There

This is my entry for this weeks Mojo Monday competition.


I have used Craftwork Cards Ice Cream Parlour Paper Pack and the Flowers were from the Sorbet Scoop Die Cuts. I also added some spotty ribbon.


I attended a workshop at The Stamp Pad in Greenfield recently where we used the Brights version of this set. These are 2 of the cards I made then,I really liked them, however I prefered the more muted, softer tones, rather than the Bright ones.

Happy Crafting

Tuesday 7 June 2011

Cheating :)

Hello

The card i am going to show you today, was not made by myself, but my lovely niece, Jade.
This is a card for Great Grandma, who passed away recently. She wanted her 'Big Grandma' to have something from her to keep with her in the coffin.
The poem on the tag was one which she made up herself just to let her great gran know how much she will miss her. Just to let you all know Jade is just 15 years old!
The card was edged with a Fiskars Scalloped punch, as was the pocket. The stamped image was a Hot Off the Press corner stamp inked with Distress inks. The tag was cut using the Sizzix Super scalloped tag (otherwise known as 'the big fat tag!')

Monday 6 June 2011

Not Quite Altered Art!

Hi there

As the title suggests this is not quite Altered Art! Mind you it is 'Altered' use!
My youngest son has recently grown out of his wellies, but as both my boys have used these ones I was reluctant to throw them away. So I decided to reuse and recycle them.
My hubby drilled some drainage holes in the bottom. We put some stones in to help with drainage and also to give them weight so they didn't blow over in the wind! Add some potting compost, a couple of bedding plants and you have a unique feature for you garden! Since we have done them, everyone who has been to the house has been dragged outside to be shown them!
The idea originally came when I saw a garden centre selling resin ones, unplanted, for £19.99.


Friday 3 June 2011

Tatty Ted Card

Hello

This card is one I made for a very special girl who has been very poorly in hospital.
The card is a white scalloped A5 card, this came form a pack which was bought from QVC at a very special price! The main element was die cut using an oval nestability and then decoupaged. I then inked the edges with Stormy Sky distress inks. A Get Well Soon peel off was added and then delivered to my special friend.
Happy Crafting

Wednesday 1 June 2011

Kaisercraft

Good morning

Over the past few days I have been playing with a Kaisercraft Mini Book and Stand, I bought these from The Stamp Pad. But any Kaisercraft stocking shop should have them.

First I painted the stand with a metallic paint (from B&Q), but this seemed to take forever to get a good coat and dry. When it came to painting the actual books I decided to use some Inka-Gold metallic gloss paint. This is amazing stuff as a little goes a long way. You appy it with a sponge or piece of cut and dry, it's creamy not a liquid and gives fantastic coverage with only the smallest amount. Its very quick and easy to apply.
 Then I spent a good few hours to choose my papers! ! I just kept finding more! I eventually went with some papers from BoBunny 'Blast Off', Prima 'My Little Guy' and Prima 'Hello Spaceboy'. I used the 6x6" paper pads as the designs on them were just the right size.
For the circular book I used my EK Success Circle Scissor to cut the circles (only to find out the chipboard isn't actuall circular but slightly oval!). I stuck paper on one side, them remember to repunch your holes before you stick the other side on, otherwise you won't know where the holes are supposed to go. Can you guess what I did? !?
For this book I simply measured the size of the book and cut them square and then rounded the corners off.
For this book I did wonder how I was going to cut the papers?? Even to the point where I asked my dear hubby if he could scan the books and scale them down on his laptop so I could then print it and make a template to draw around! Then I suddenly remembered my Nesties Labels 1. They are a great match and much easier to cut then using scissors!
Here is my completed books and stand. Now all I need to do is to pick the photos to go inside! However as they are small (approx 3") I can use those photos we all have where my boys look fab but there is a tree or something in the background that you just don't want there, now I can chop it out.

Hope you like this project, I really do appreciate you comments.

Happy Crafting